The French term for ‘wand’ is ‘baguette magique‘, something that has been making me smile ever since I met my real-life, magician-baker husband Dragan, nearly twenty years ago.
The combination of talents and skills required to perform as a teacher, or as a magician, are in fact rather similar. You need knowledge, experience, insight, patience, the wit to improvise, and, above all, humour. Same goes for being a good baker. Getting up at 3 am to bake for the village, you need good coffee and a few dark jokes to keep you going!
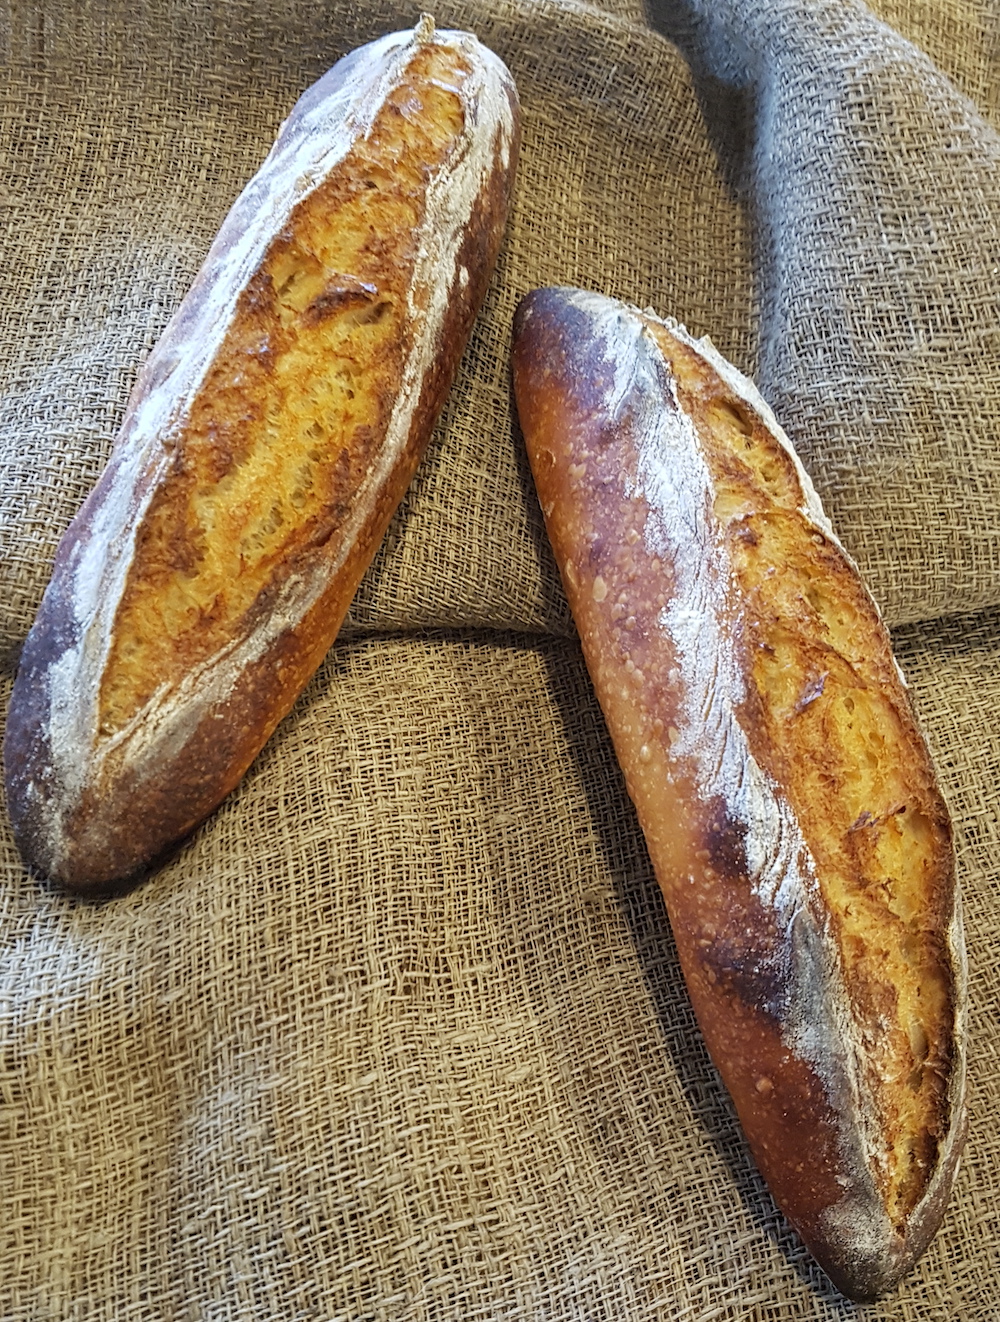
The rewards for getting it right are unmistakeable. Beautiful, authentically artisan loaves, crafted by happy students who leave inspired to repeat their own performance on a regular basis.
Here’s the recipe for Dragan’s most recent magic wands:
Ingredients (for one large or two small baguettes)
Mix the dough and knead for 5 minutes (20 to 30 rock n rolls)
First fermentation 3-4 hours. Aim to maintain dough temperature at 25 or 30 C. The heat helps develop the gluten.
Shape baguettes and prove on the baguette tray for 1 to 2 hours, until it springs back half way when poked.
Bake, using steam if possible, at 250 C for 10 minutes, reducing to 210 C for 11 minutes (21 mins total)
Et voilà!
P.S. If all (or any of) this seems a bit daunting, how about joining one of our live or online classes? Good for beginners, refreshers, improvers and even the odd superstar!
There’s a lot to love about Christmas baking. The scents of nutmeg, cinnamon, ginger and cloves, the kick of rum or brandy, the silky indulgences of chocolate and cream in truffles and trifles. It’s fabulous, but, let’s face it, it’s pretty expensive too! Something cheap & cheerful, and preferably charming too, is very much in order.
With prices rising even as we queue at the till, the idea of some more budget-friendly baking has a great deal of appeal.
This is especially true when we’re baking with younger children, who probably don’t yet appreciate the allure of all that pricey spice. The answer is simple: bake bread! It’s as cheap as flour and water, and if you bake little rolls, they’ll be done in under 20 minutes in the oven.
Baking bread from scratch is always a rewarding experience, but turning ordinary dough into adorable hedgehog-shaped buns takes it to a whole new level of fun! This whimsical baking project is perfect for a cosy weekend activity, especially if you have little helpers in the kitchen.
The process begins with a simple yeast dough, kneaded until smooth and elastic. This is a great opportunity to get the kids involved – they’ll love the hands-on experience of kneading the dough! Once the dough has risen, the real creativity begins.
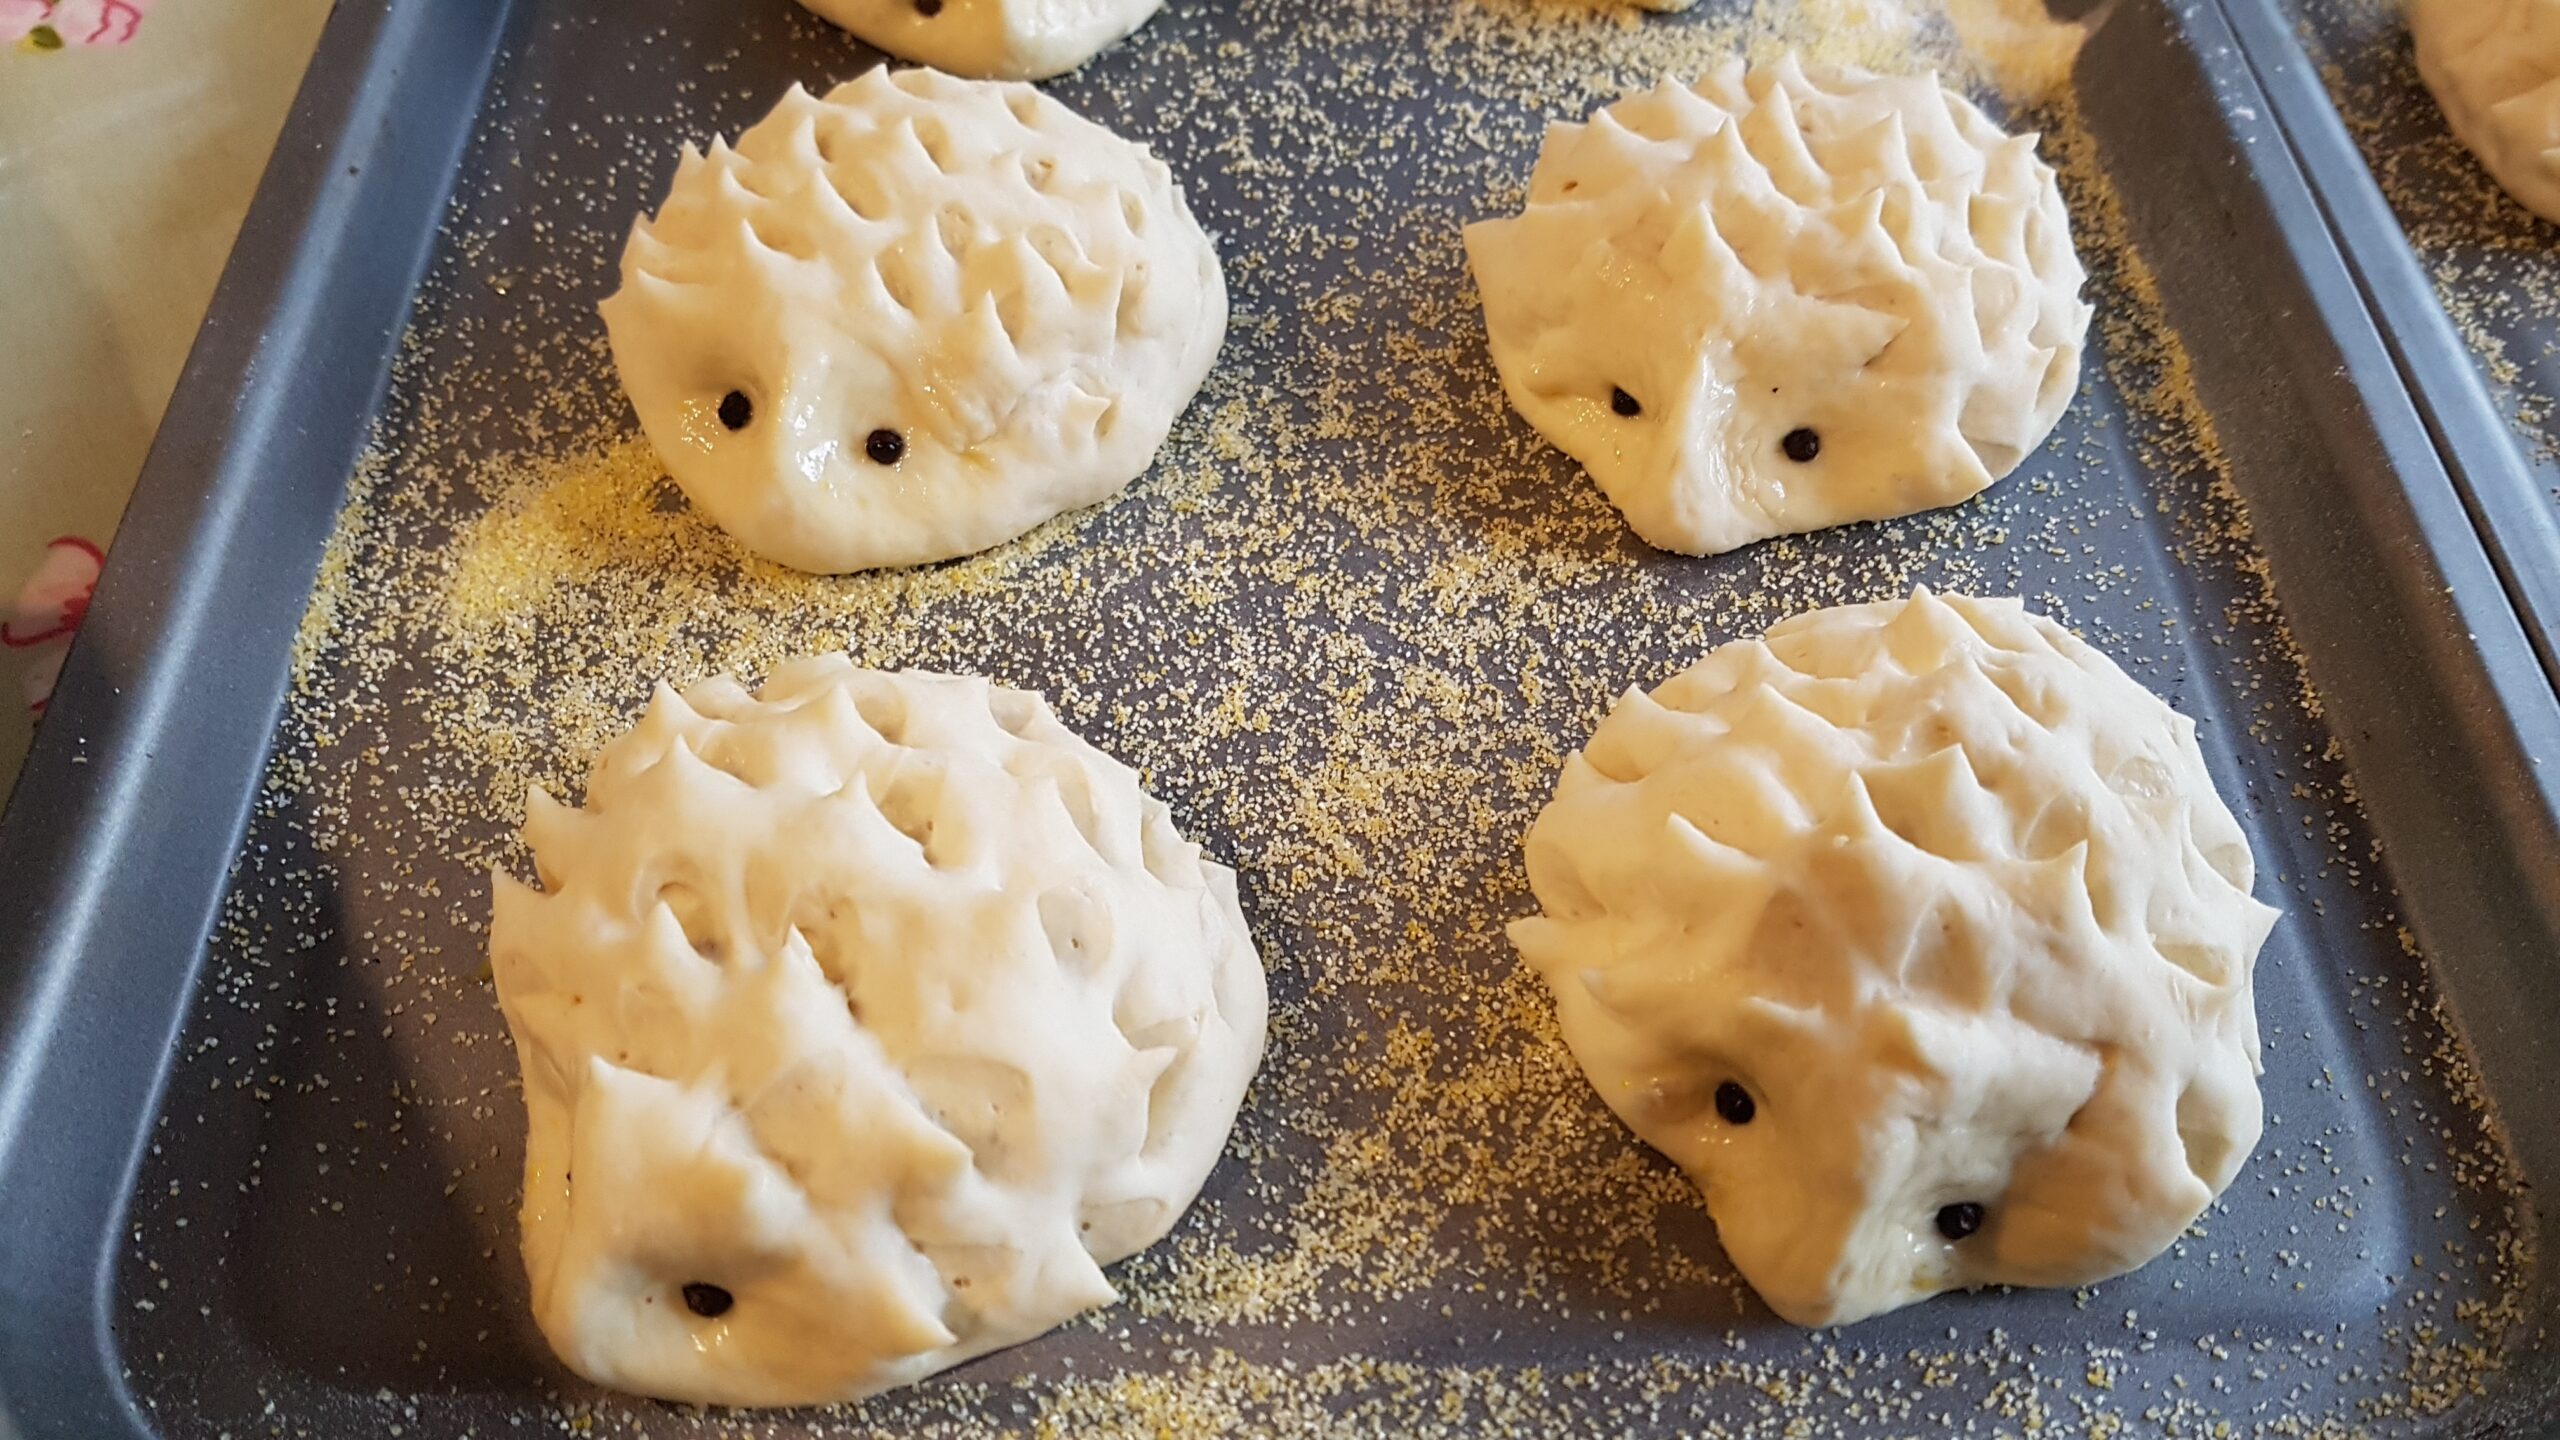
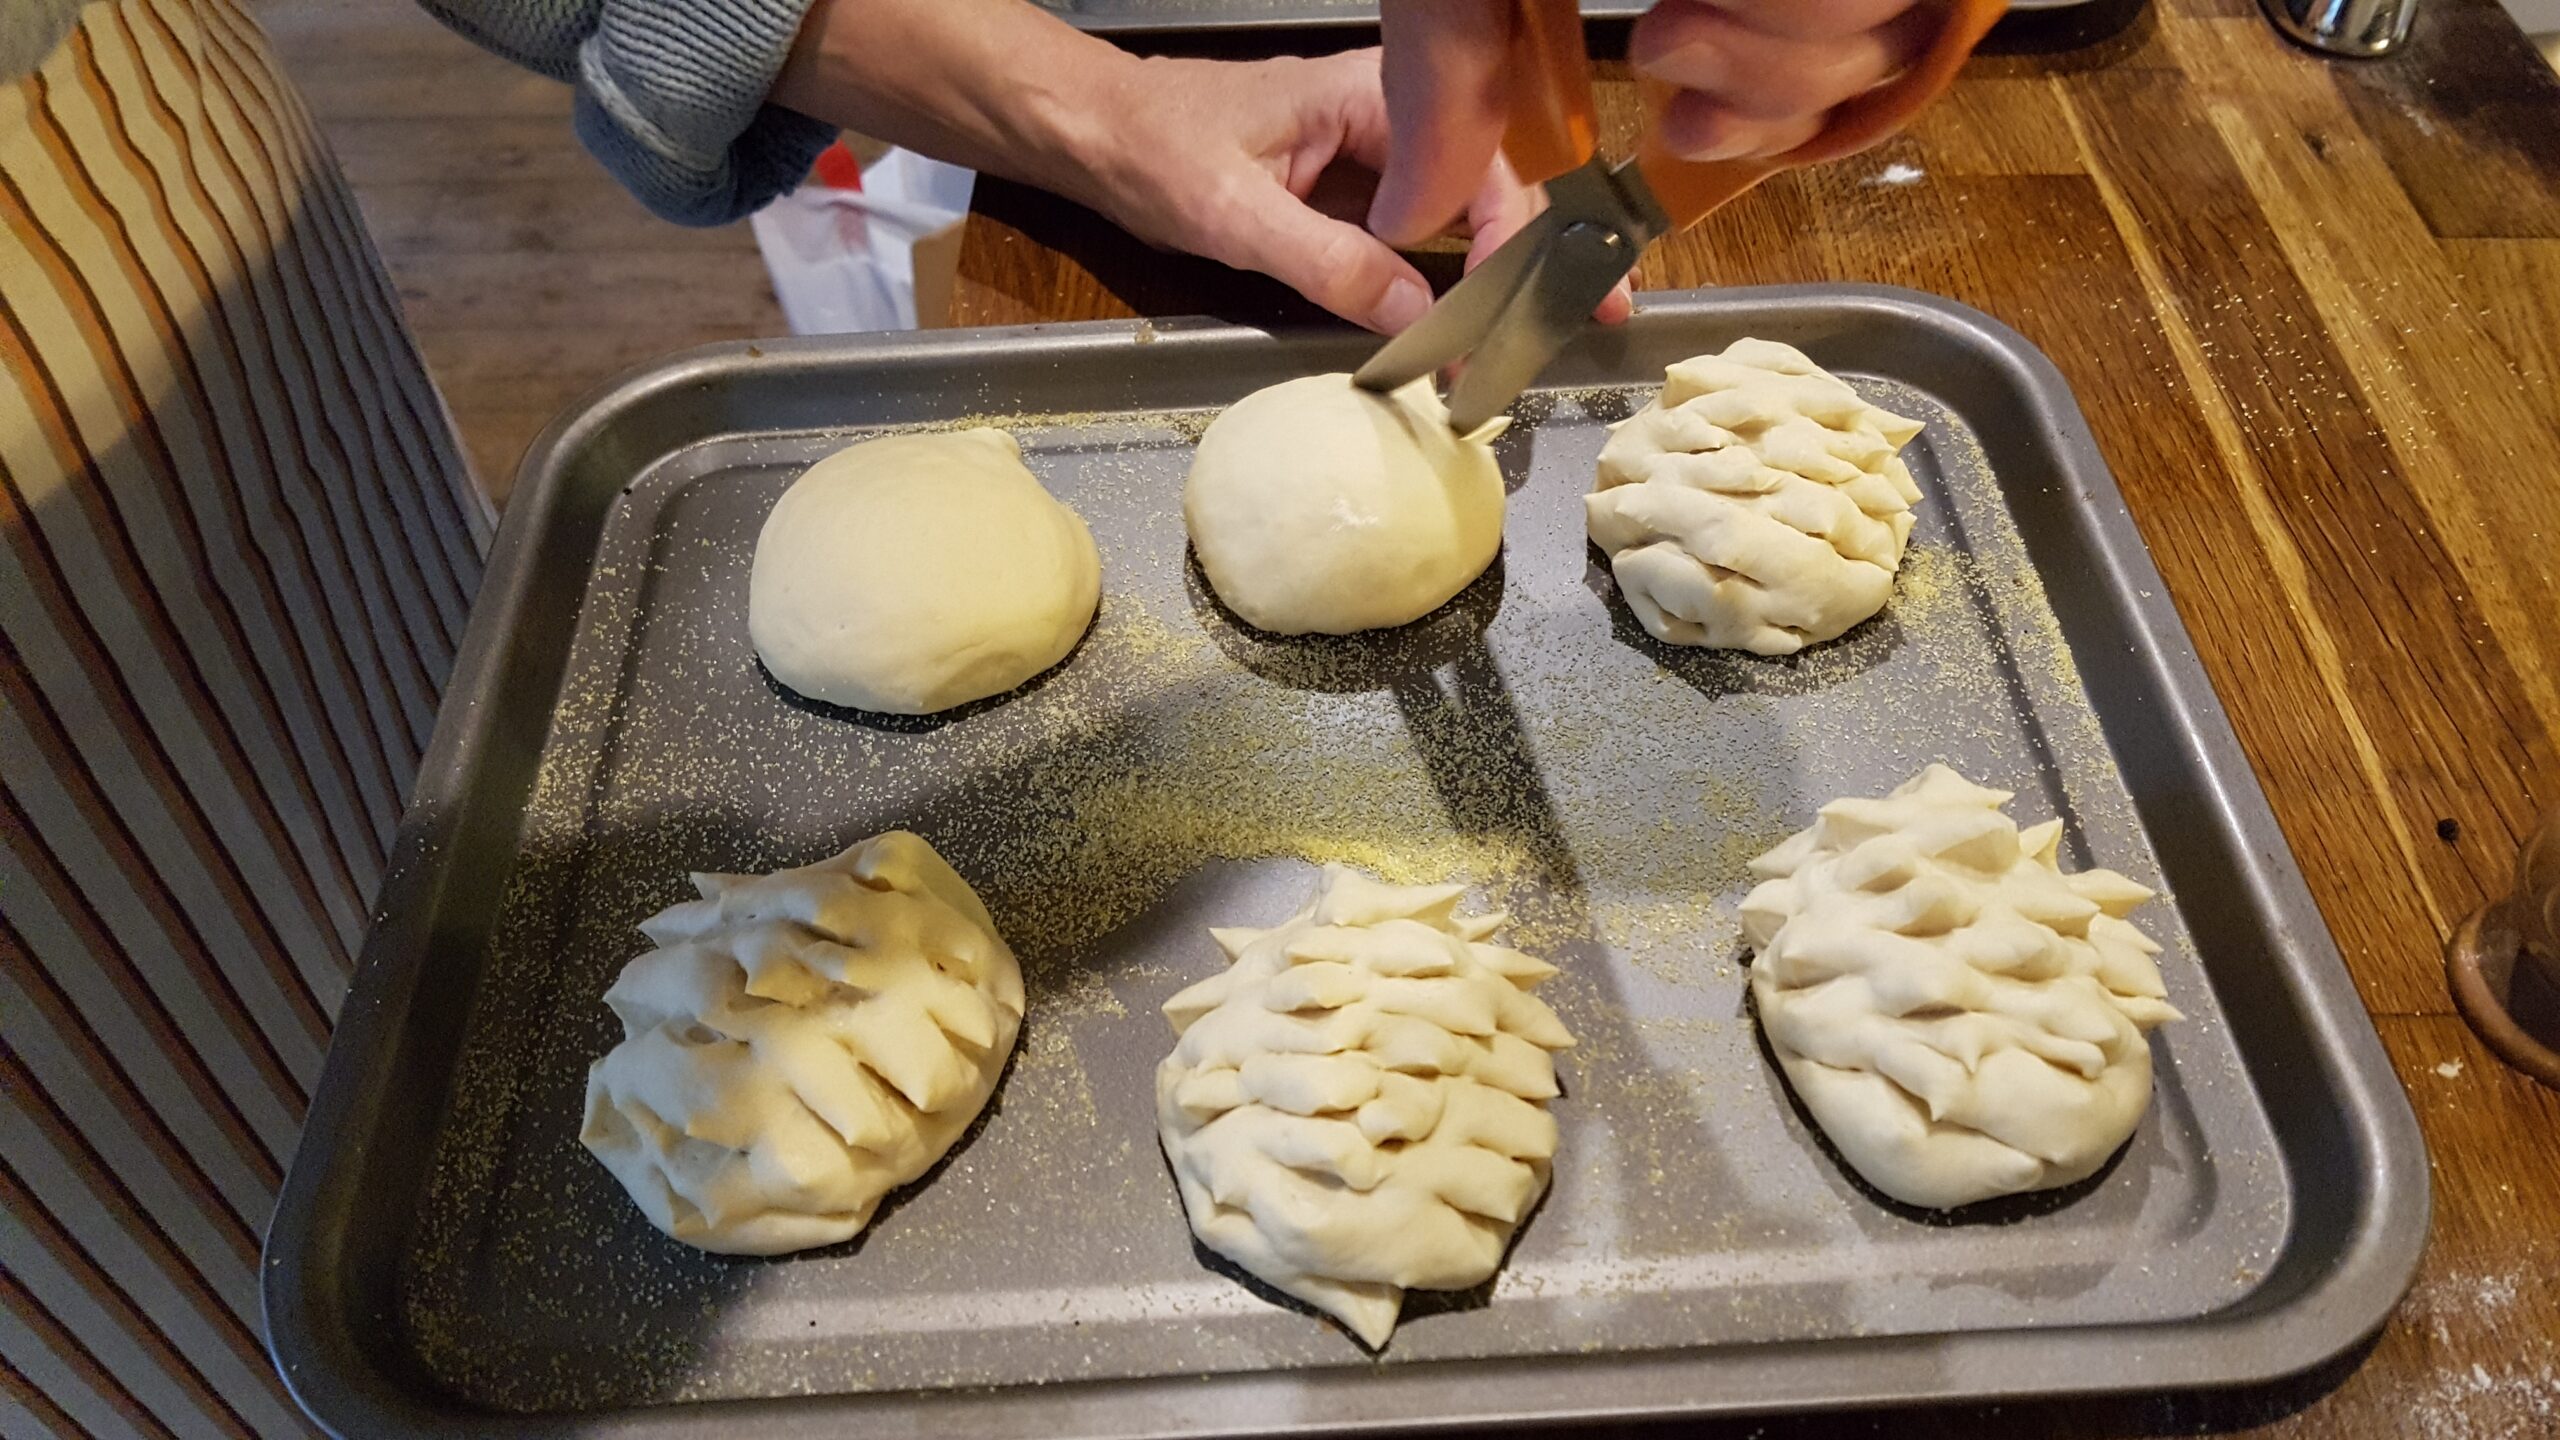
Shaping the dough into small oval buns is the first step in bringing our hedgehogs to life. For the hedgehogs’ prickly backs, snip the dough with scissors to create little spikes. This part is not only fun but also helps kids develop their fine motor skills.
The final touch is adding two tiny raisins or black peppercorns for the eyes, giving each hedgehog its own unique personality.
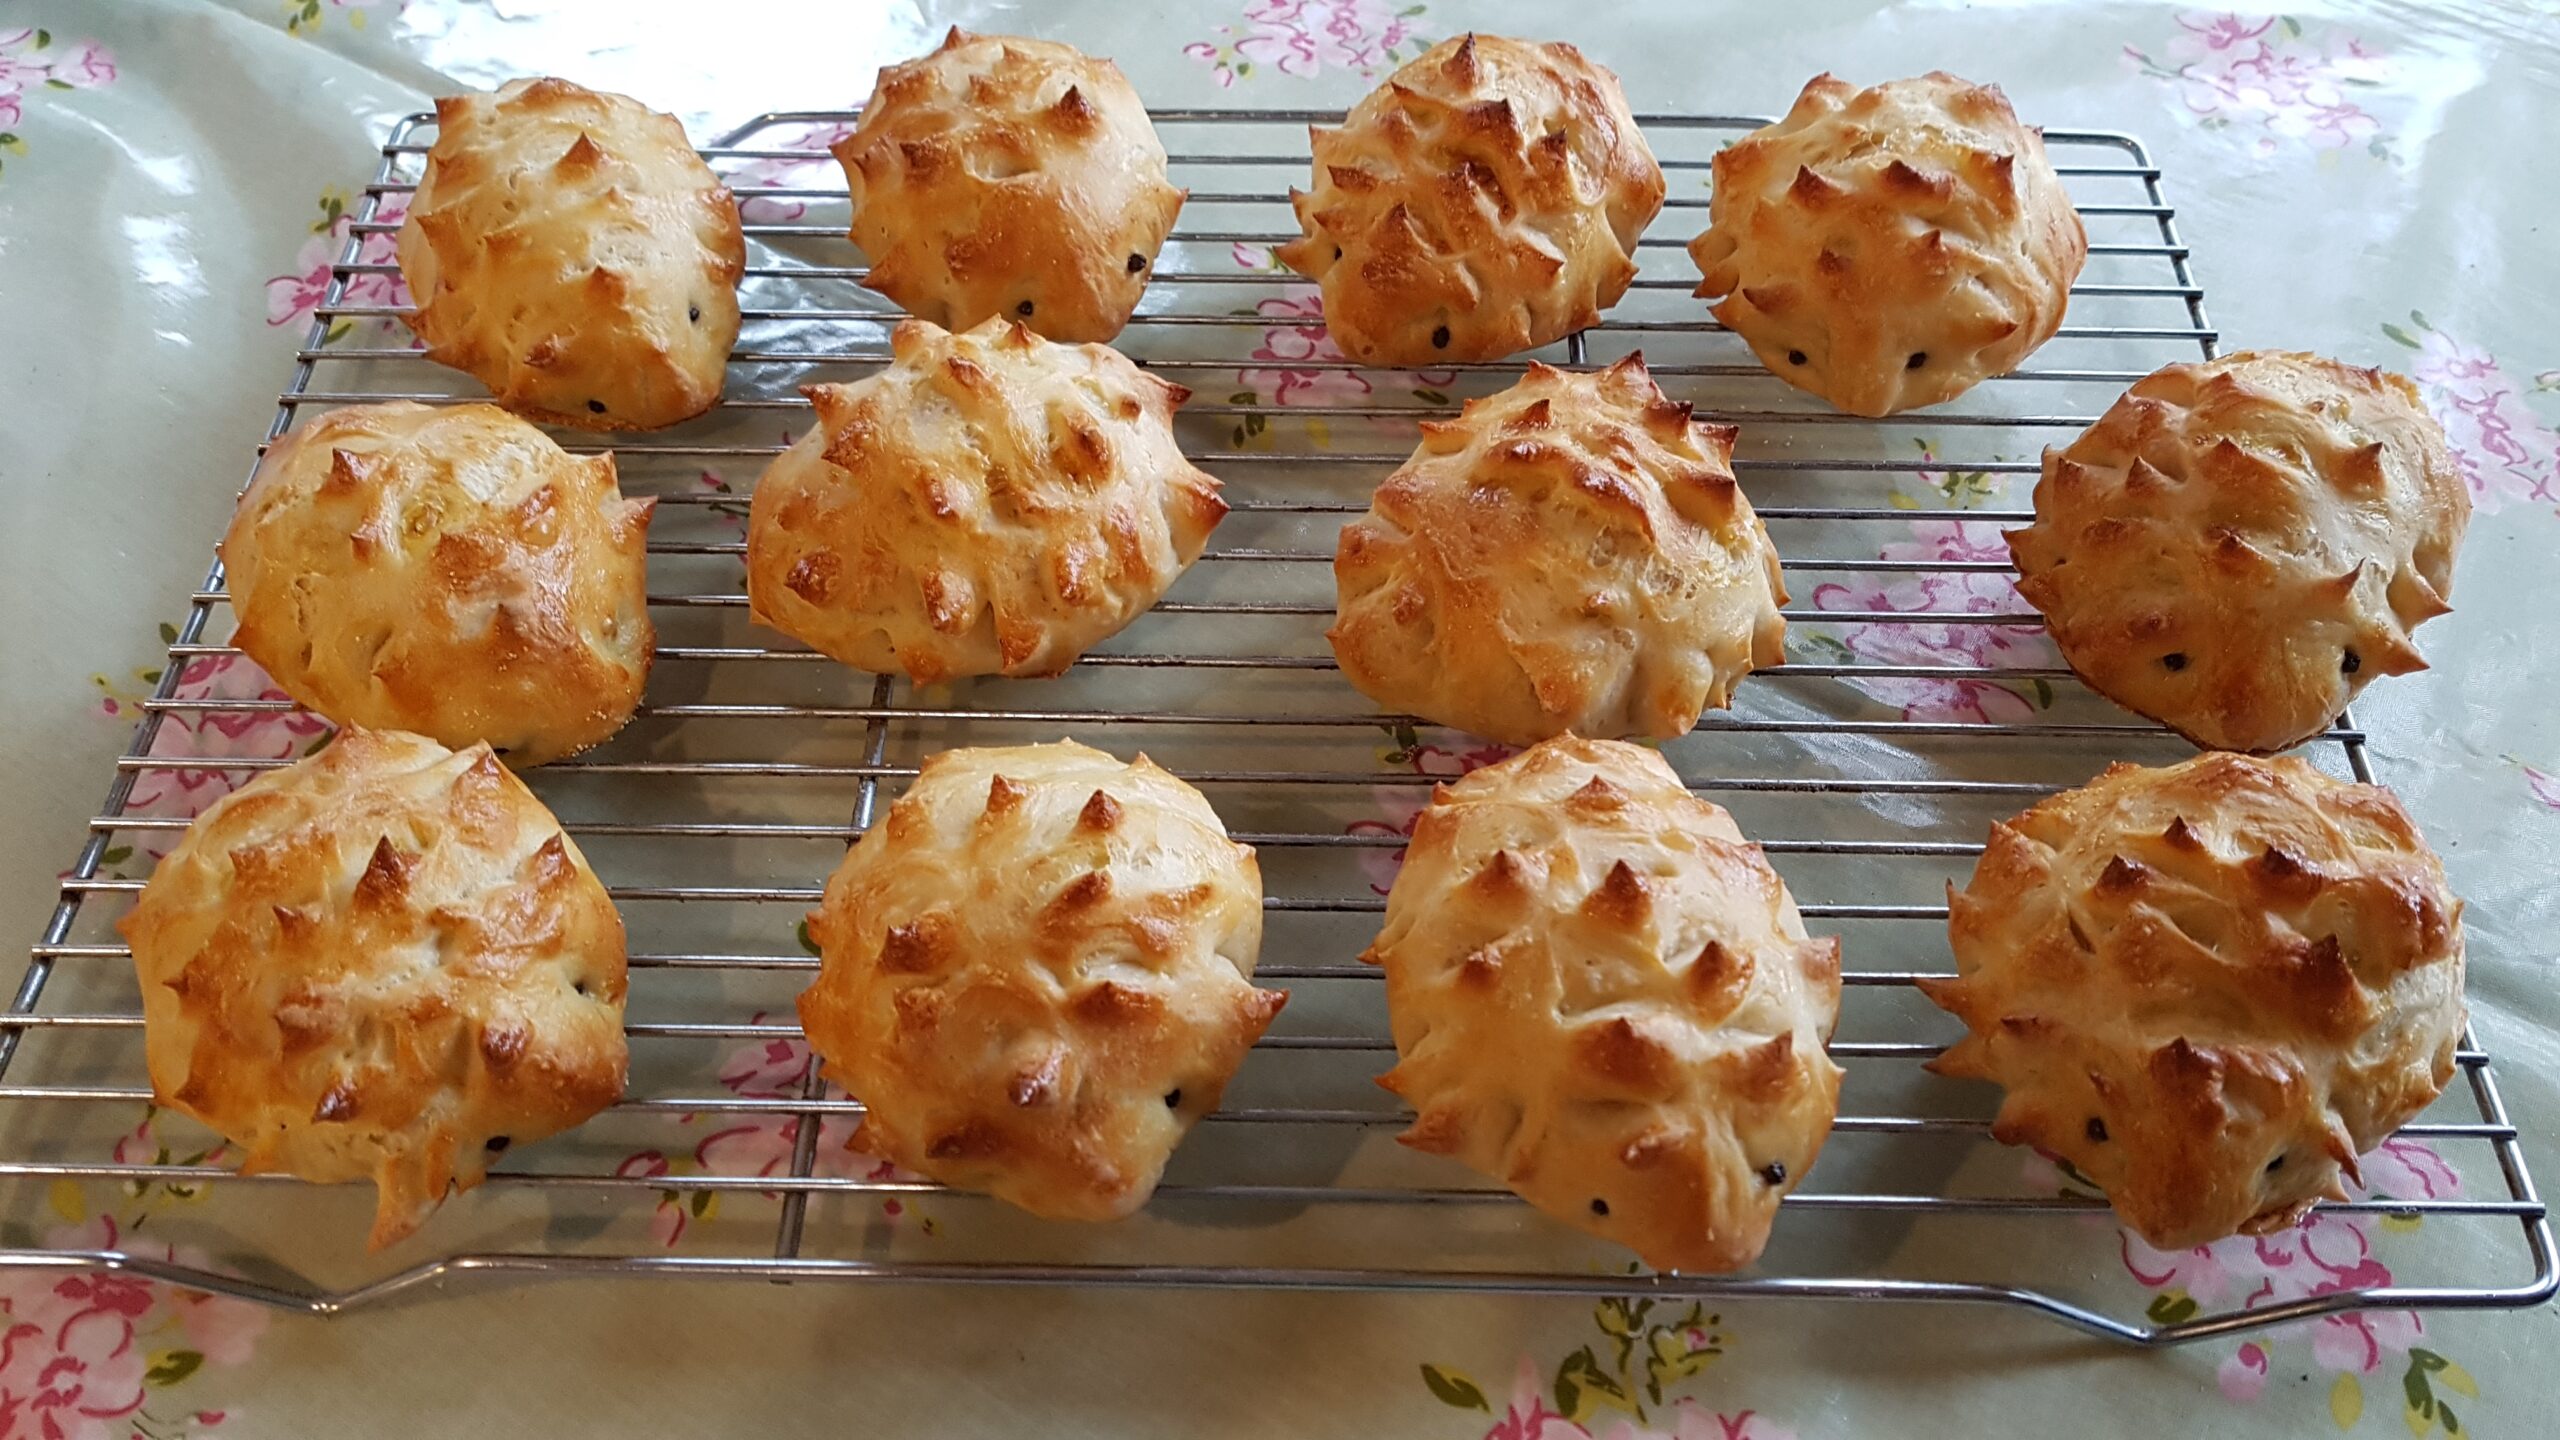
Serving these charming hedgehog buns is sure to bring smiles. They’re not just a treat to eat but also a wonderful way to spark creativity in the kitchen. So why not turn the school Christmas holidays – or Christmas morning?! – into a cosy adventure with these cute and tasty hedgehog bread buns? 🦔🍞🌟
Here’s our recipe for “Tiggywinkles” – aka Hedgehog Rolls.
Ingredients:
500g white bread flour
5g quick yeast (we use Doves Farm)
10g salt
325g warm water
Method:
Weigh flour into a medium mixing bowl
Add yeast and salt
Add warm water
Mix into a soft, warm dough with your / the children’s hands
Knead until smooth and a bit stretchy
Cover and leave to rise for 60 minutes
Now take the dough out of the bowl and divide it into 12 pieces weighing 70g each.
Shape into balls, then pull the snout outwards. Press a raisin in each side to make the eyes.
Use scissors to snip prickles!
Leave to puff up for about 20 minutes, then bake at 180C for 17 minutes, until golden.
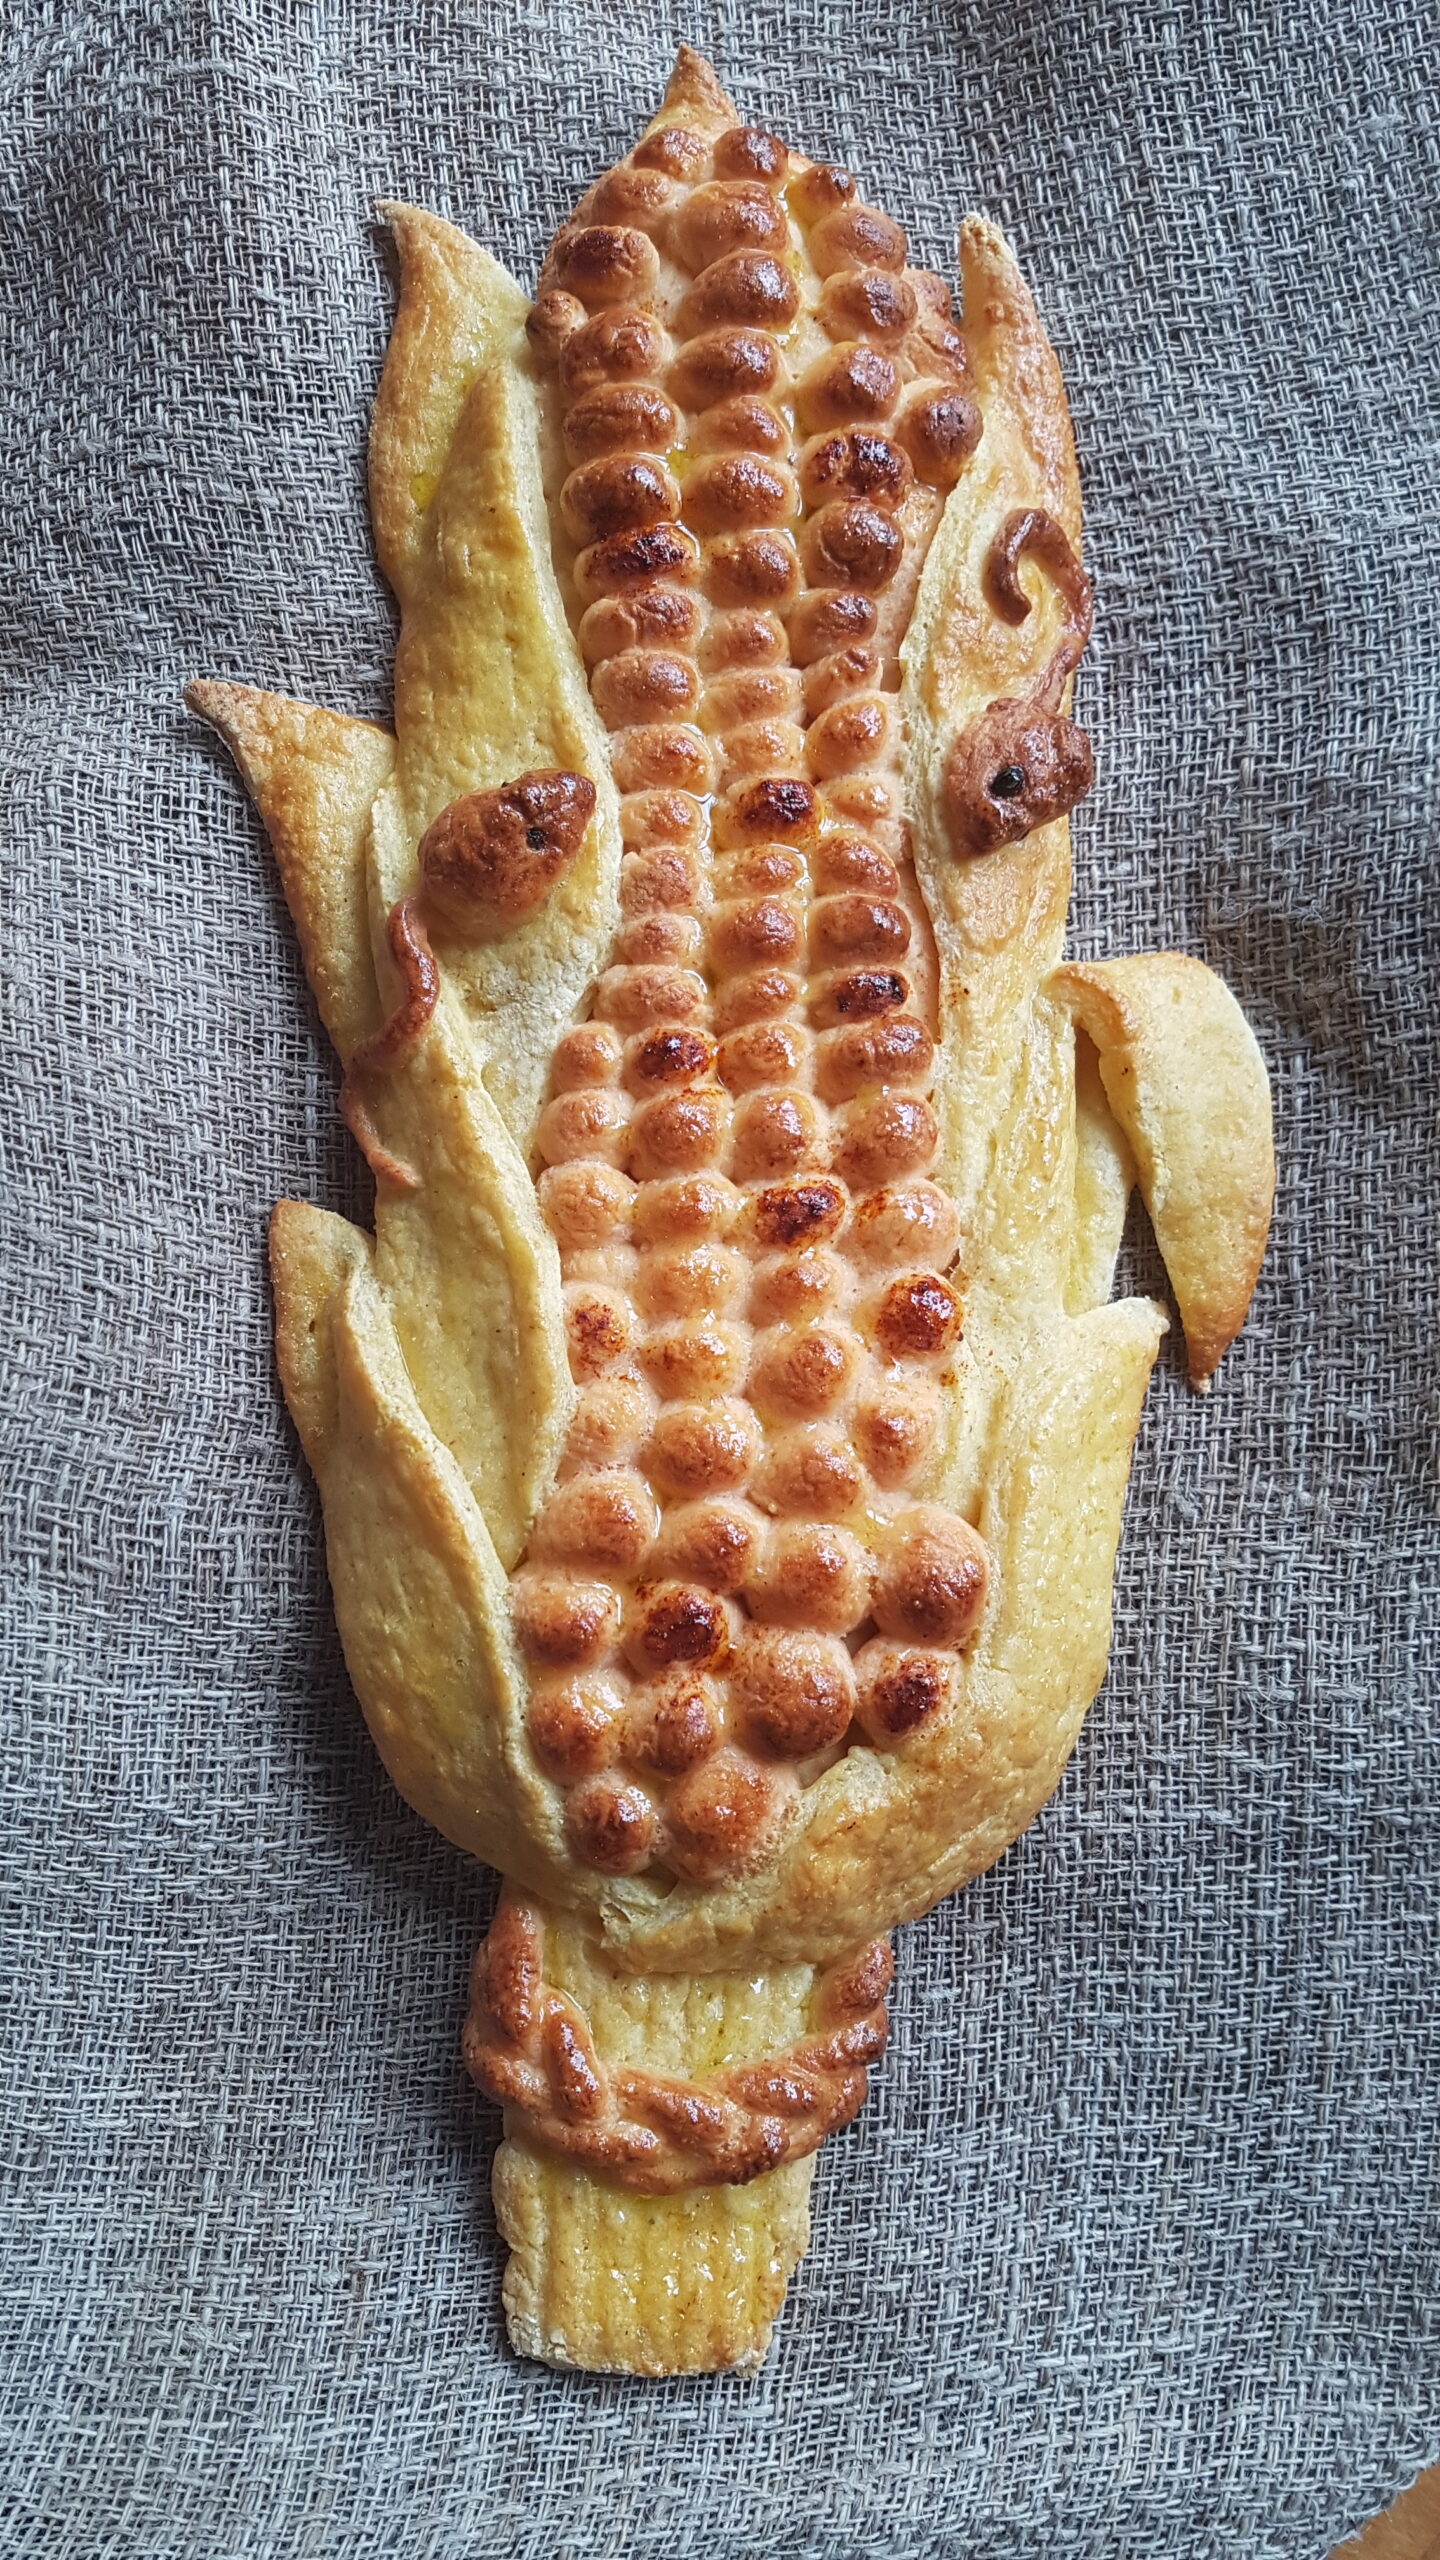
Gluten sensitive and feeling sidelined at Harvest time? Don’t be.
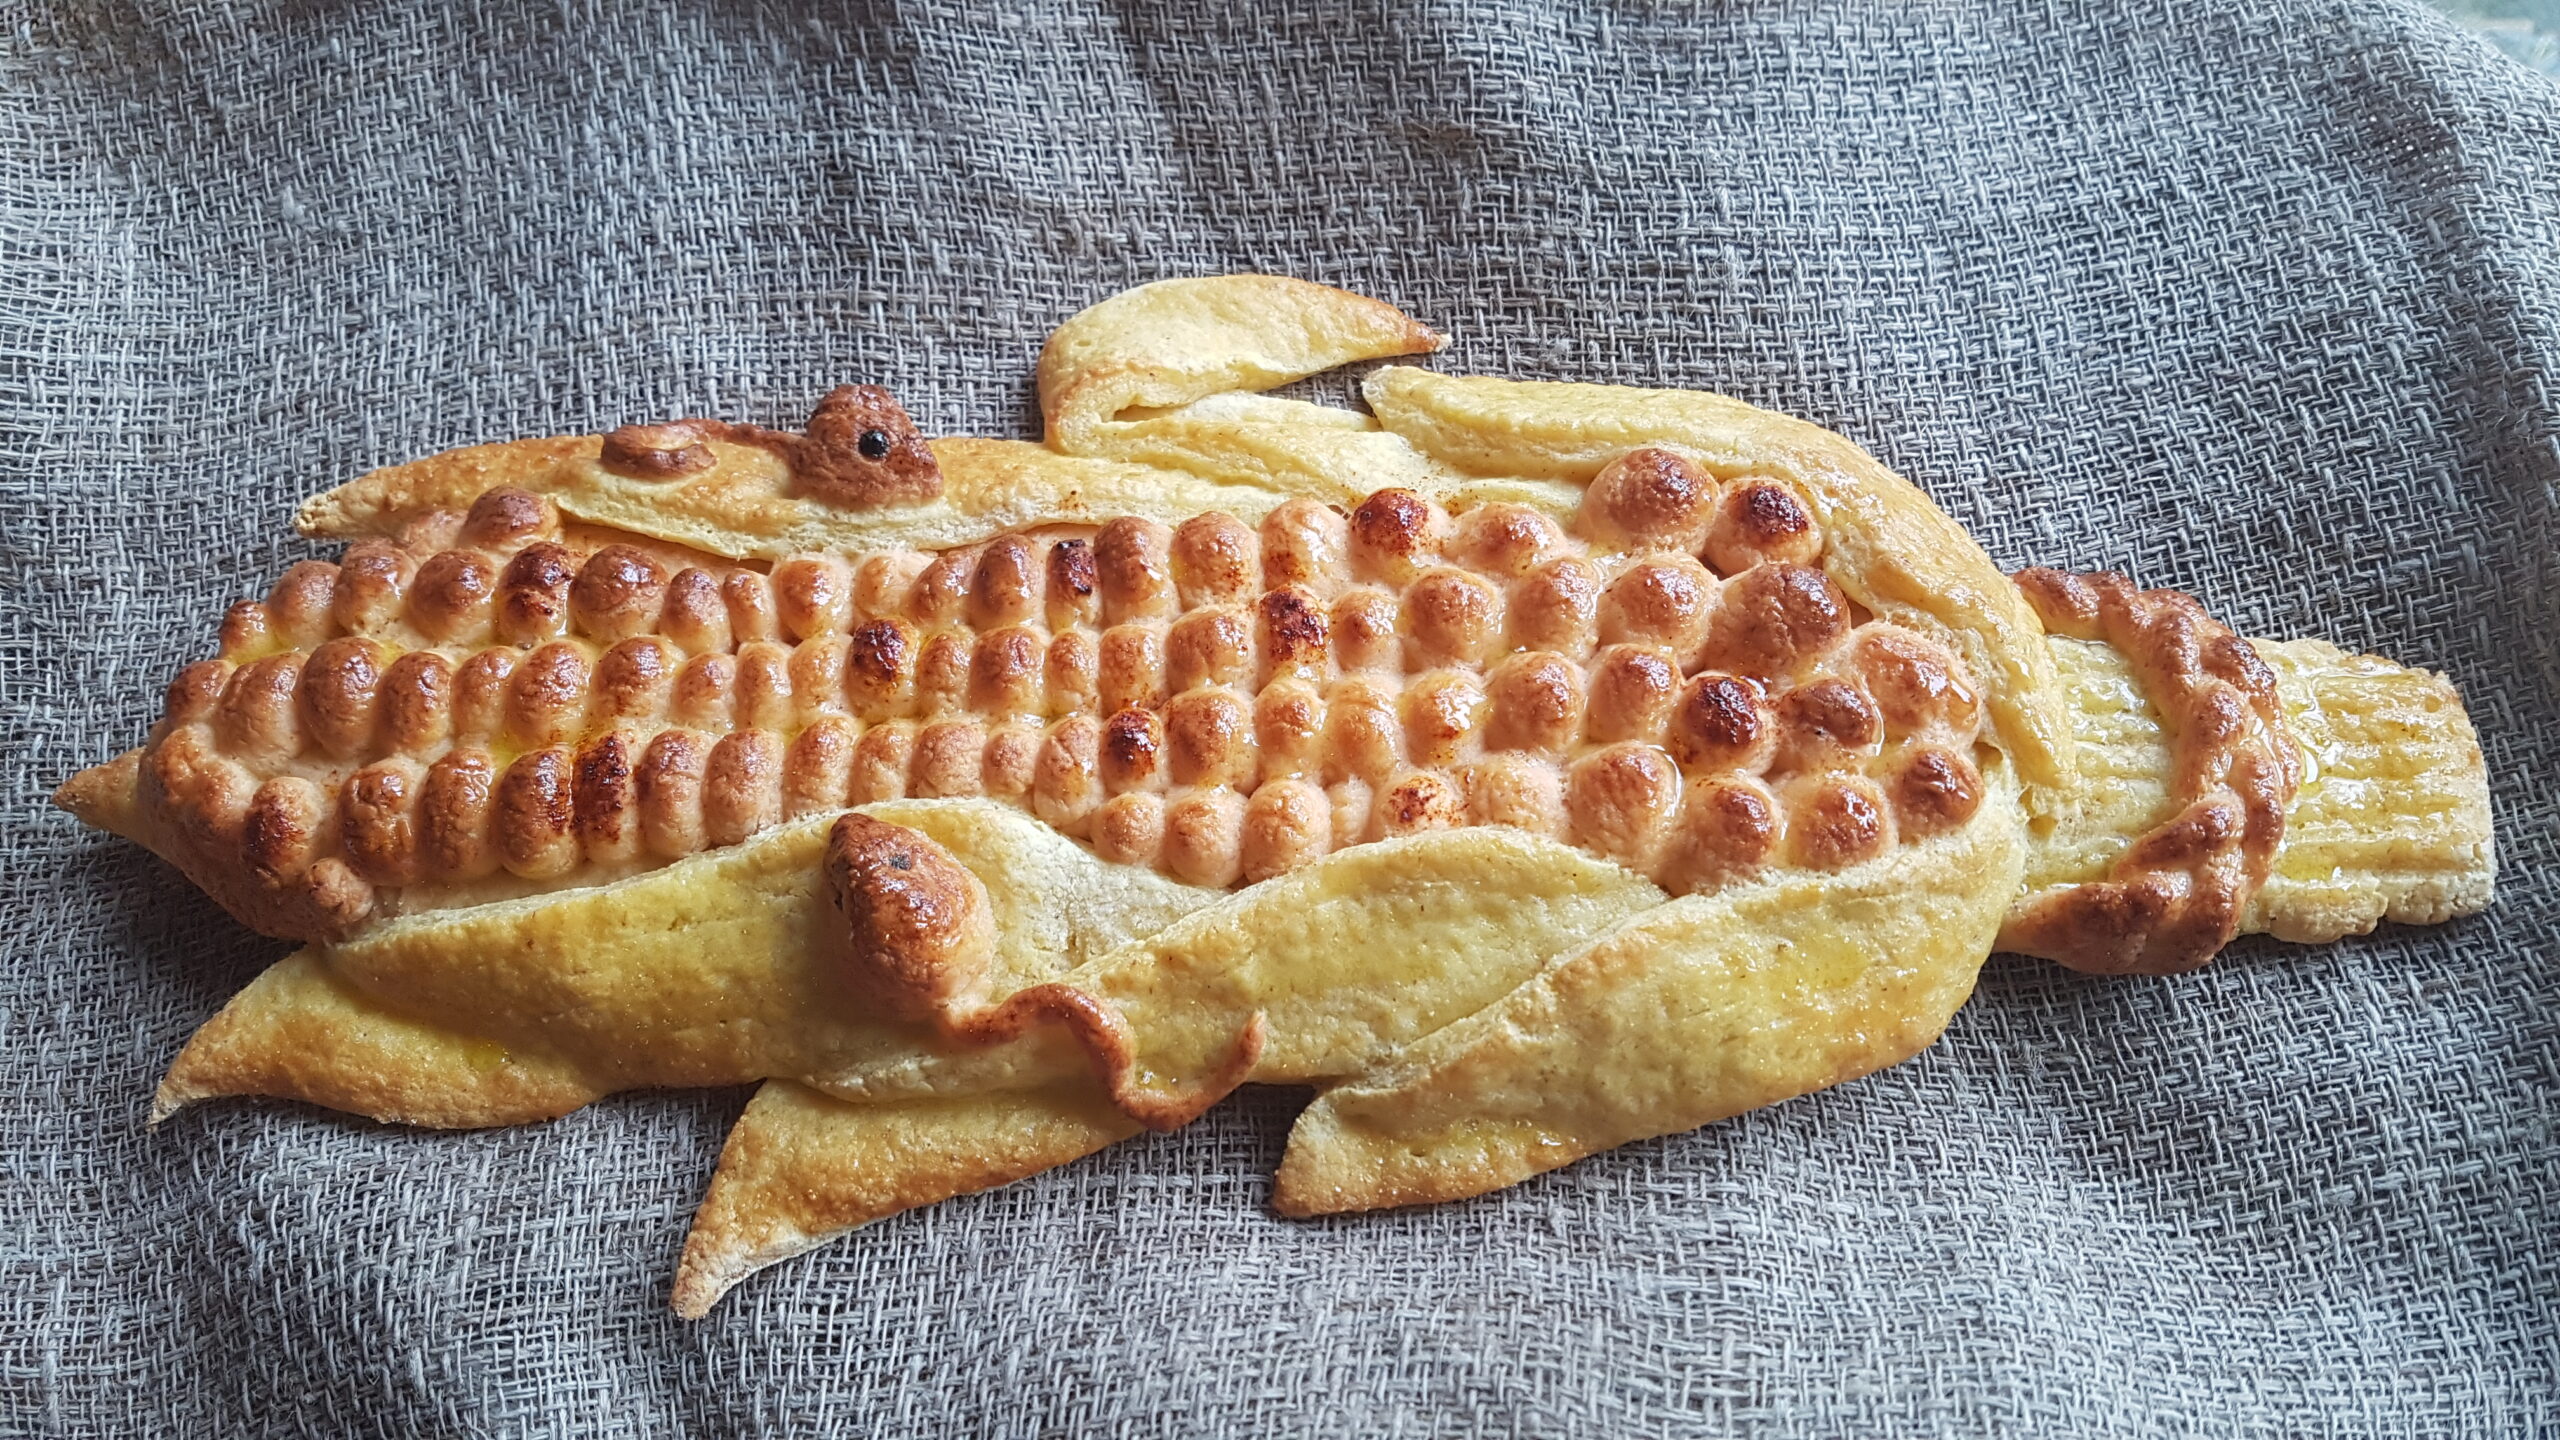
Make your own, beautiful corn cob bread from maize and red lentil flours, complete with traditional braid and field mice.
In our strange world of a-seasonal availability, with strawberries in December and blackberries in May, the notion of celebrating the Harvest at summer’s end has lost some of its grip on our collective imagination. Unless we’re farmers … or bakers. In pagan times, Harvest Festival used to be a wild, drunken and raucous party to celebrate the end of all the epic hard work of getting the wheat from the fields into the barns, an effort that involved the whole village.
Then the Church came along and tidied it up a bit, adding some helpful customs about donating surplus food to hungry parishioners, and prettifying the party with artistic displays of vegetables and breads.
Wild or mild, harvesters still like to drink cider at the end of a long, hot, itchy day in the fields. And many still love tucking in to a good old harvest loaf; I bake a few for the local schools and churches every year.
It’s not all about the wheat.
But traditions can be shy little creatures. Ignore them for too long and they fade away. So I wanted to point out that Harvest is still essential, still something to be grateful for, wherever we are, whoever we are, and, what’s more, it is not restricted to those who eat wheat. Of course, there are plenty of other crops grown in the fields that we celebrate, but they tend not to feature as centrepieces at harvest suppers. So, for a twist on the traditional Harvest Tide this year, and following on all the gluten free course creation we’ve been doing, I’ve invented a gluten free bread celebrating the harvest of maize, which can be seen growing all over the country these days, and is apparently a great favourite with field mice.
I hope you like it as much as I do!
The Recipe
Ingredients
Gold Dough
120g maize flour
60g white rice flour
45g tapioca flour/starch
45g potato flour/starch
4g salt
10g agave syrup
5g instant yeast
12g psyllium husk
12g organic apple cider vinegar
15g olive oil
240g warm water
Red Dough
120g red lentil flour
60g white rice flour
45g tapioca flour/starch
45g potato flour/starch
4g salt
10g agave syrup
5g instant yeast
12g psyllium husk
12g organic apple cider vinegar
15g olive oil
240g warm water
Method
Weigh all the dry ingredients for the Gold dough into a medium bowl and swish together briefly with your hand.
Pour warm water into a jug and stir in the vinegar, oil and syrup.
Pour the mixture into the bowl of flours and beat until smooth.
Repeat with the Red dough.
Leave both bowls of dough to rest for an hour.
To form the corn cob:
Line your largest tray with baking paper.
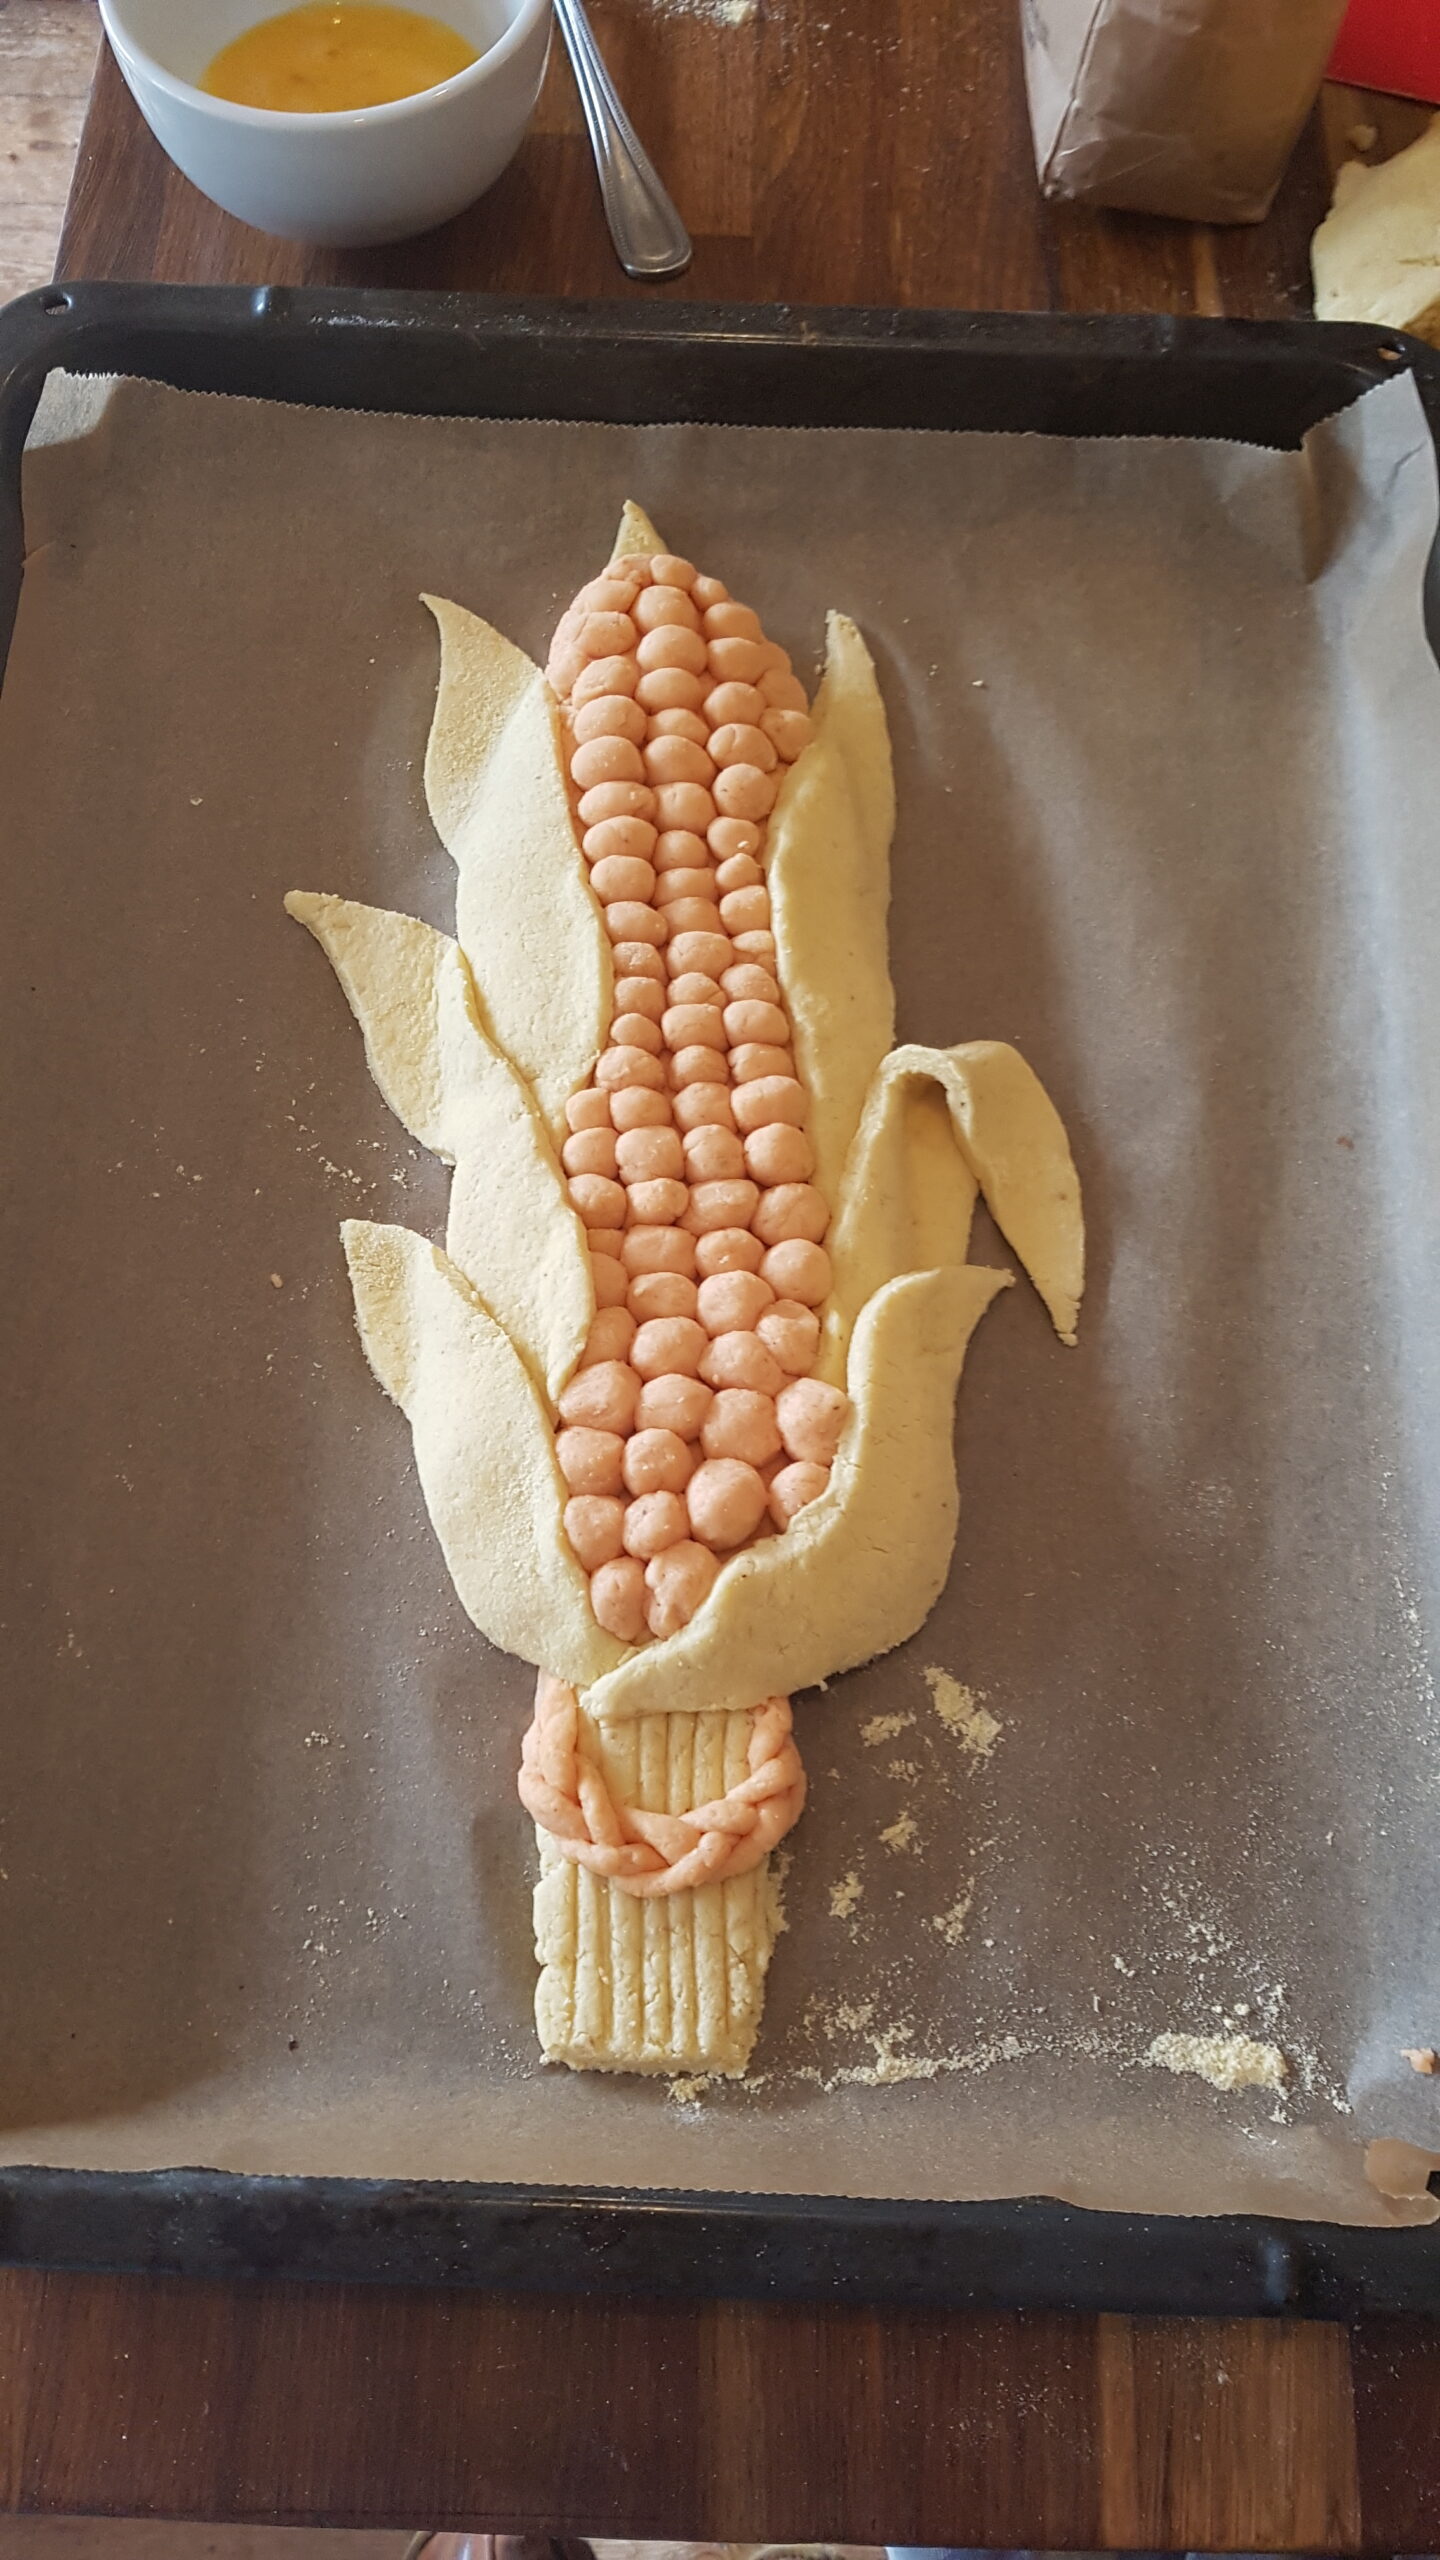
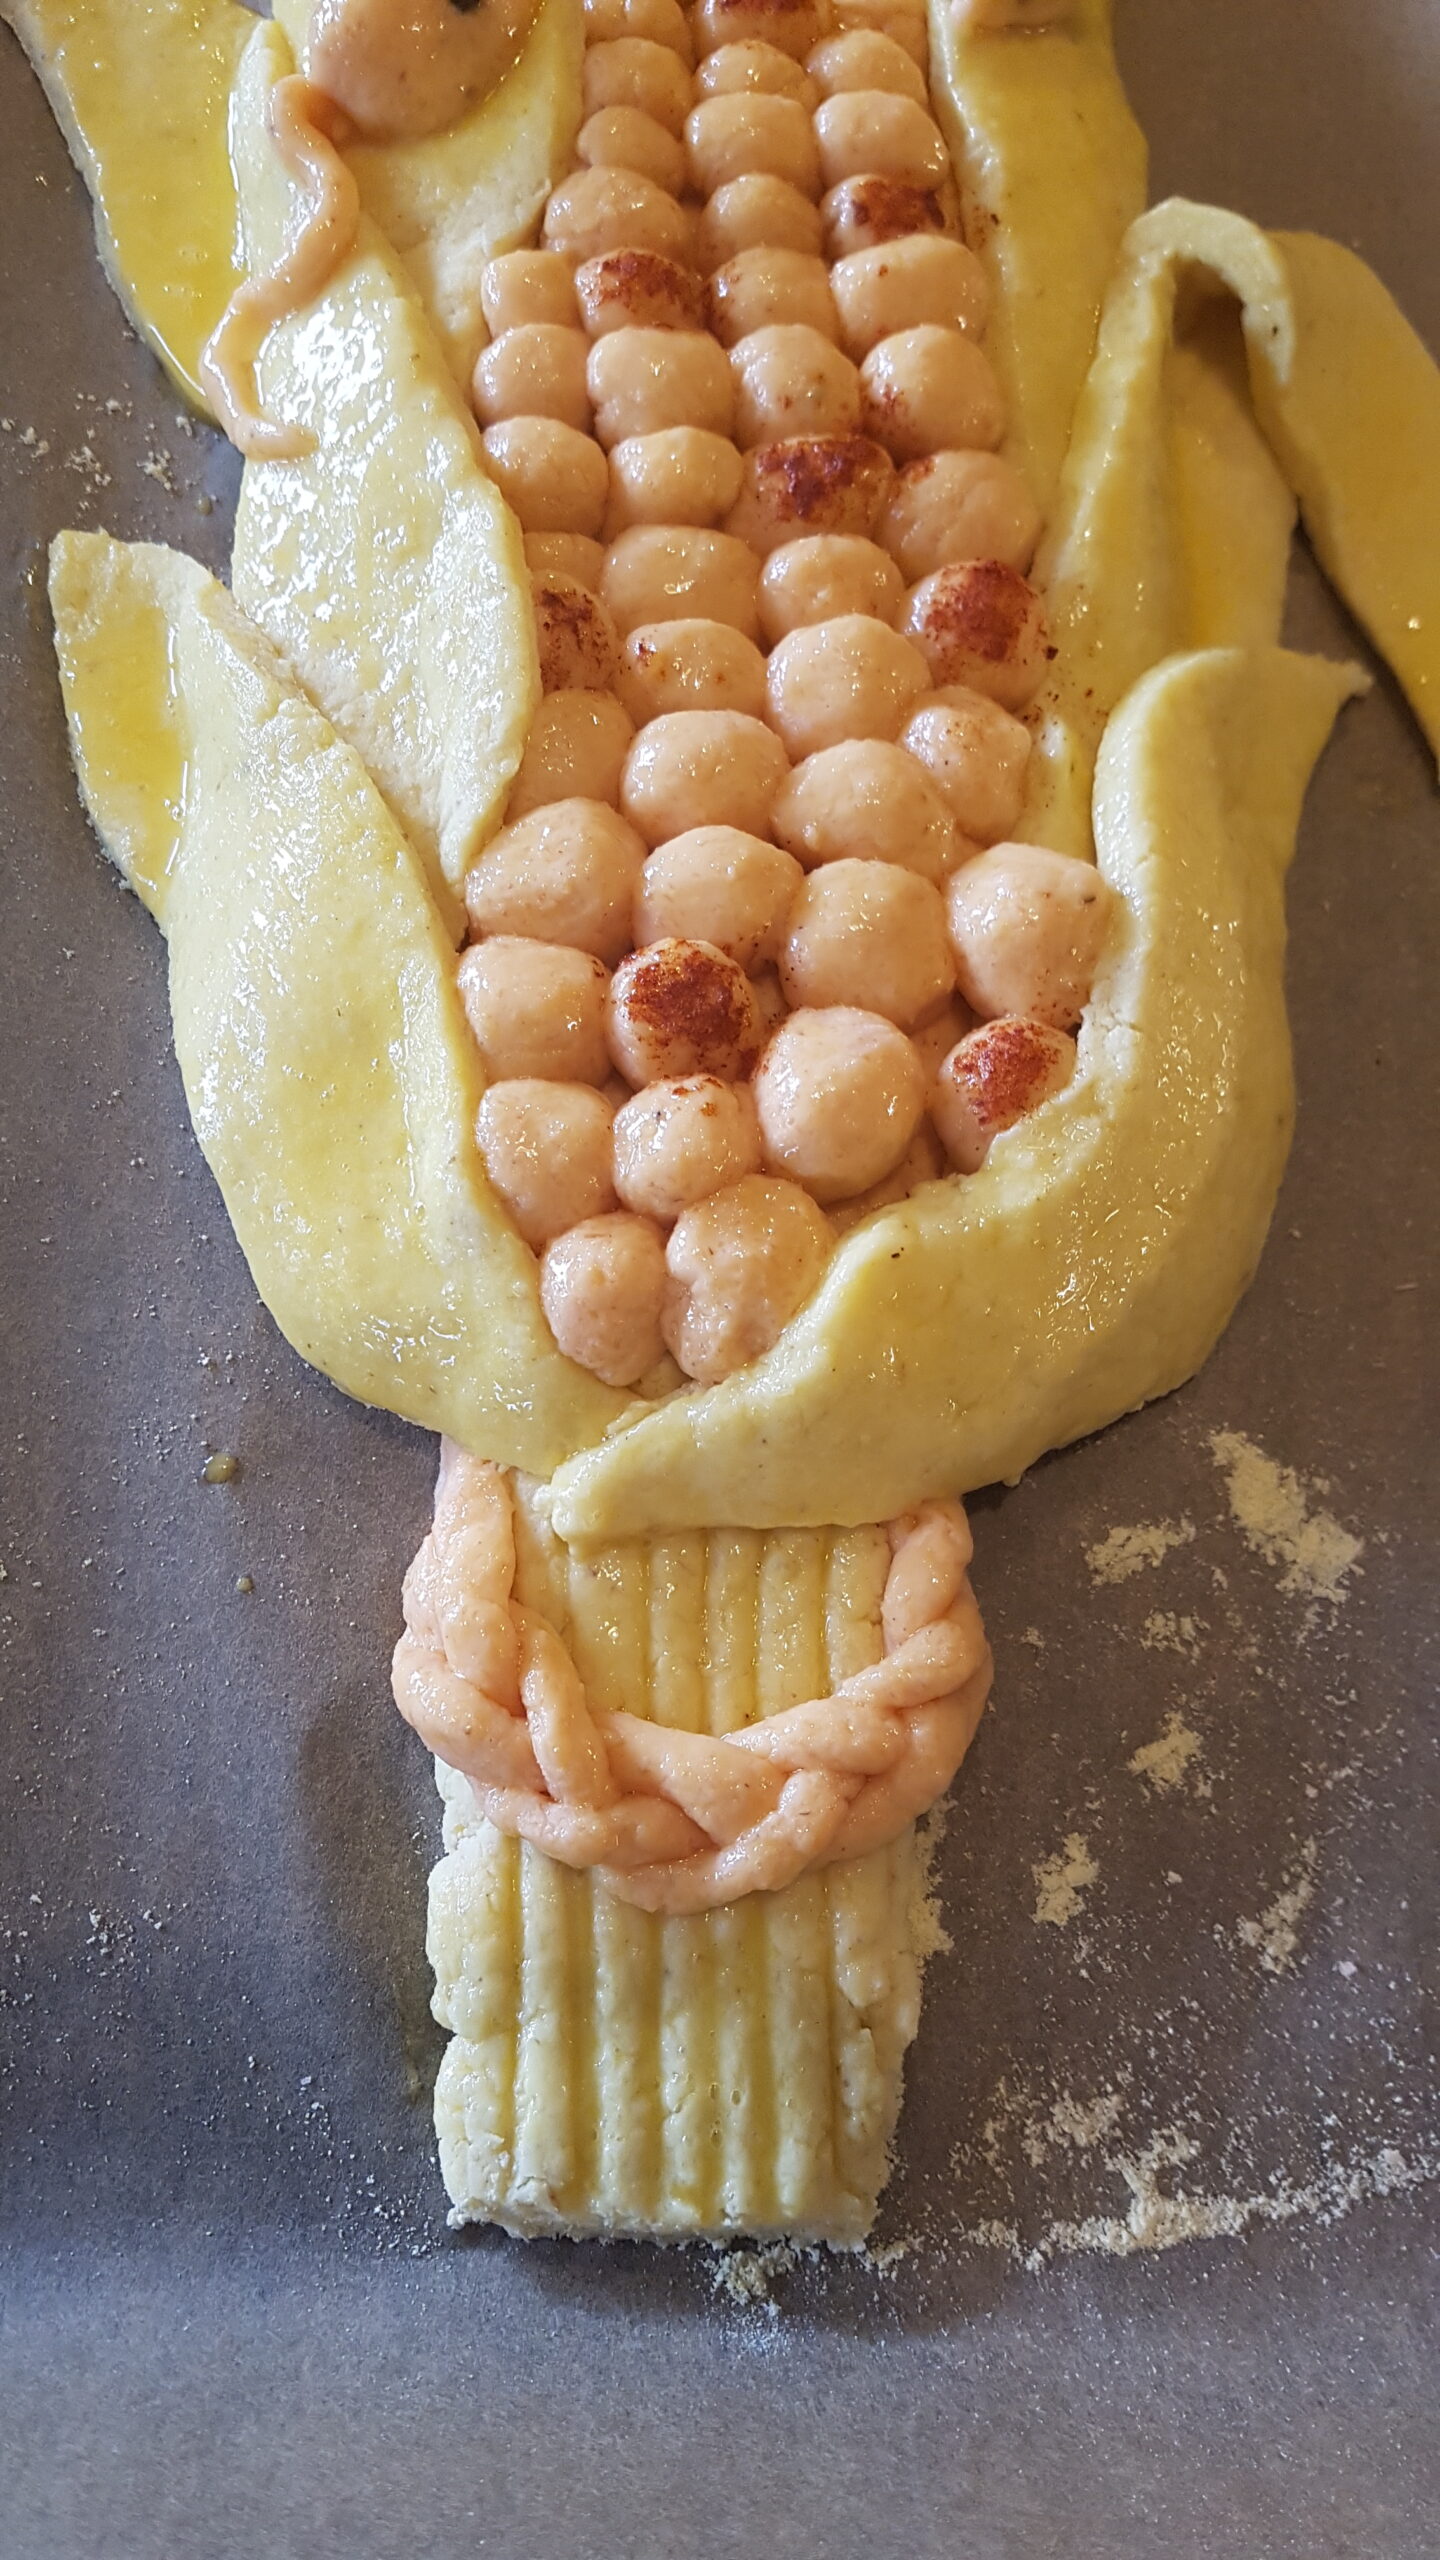
Take 2/3 of the red dough and shape into the long base of the corn cob on the paper.
Add a stalk using some yellow dough.
Roll the rest of the red dough into long strands, then snip off small pieces to roll into balls. These will be your niblets.
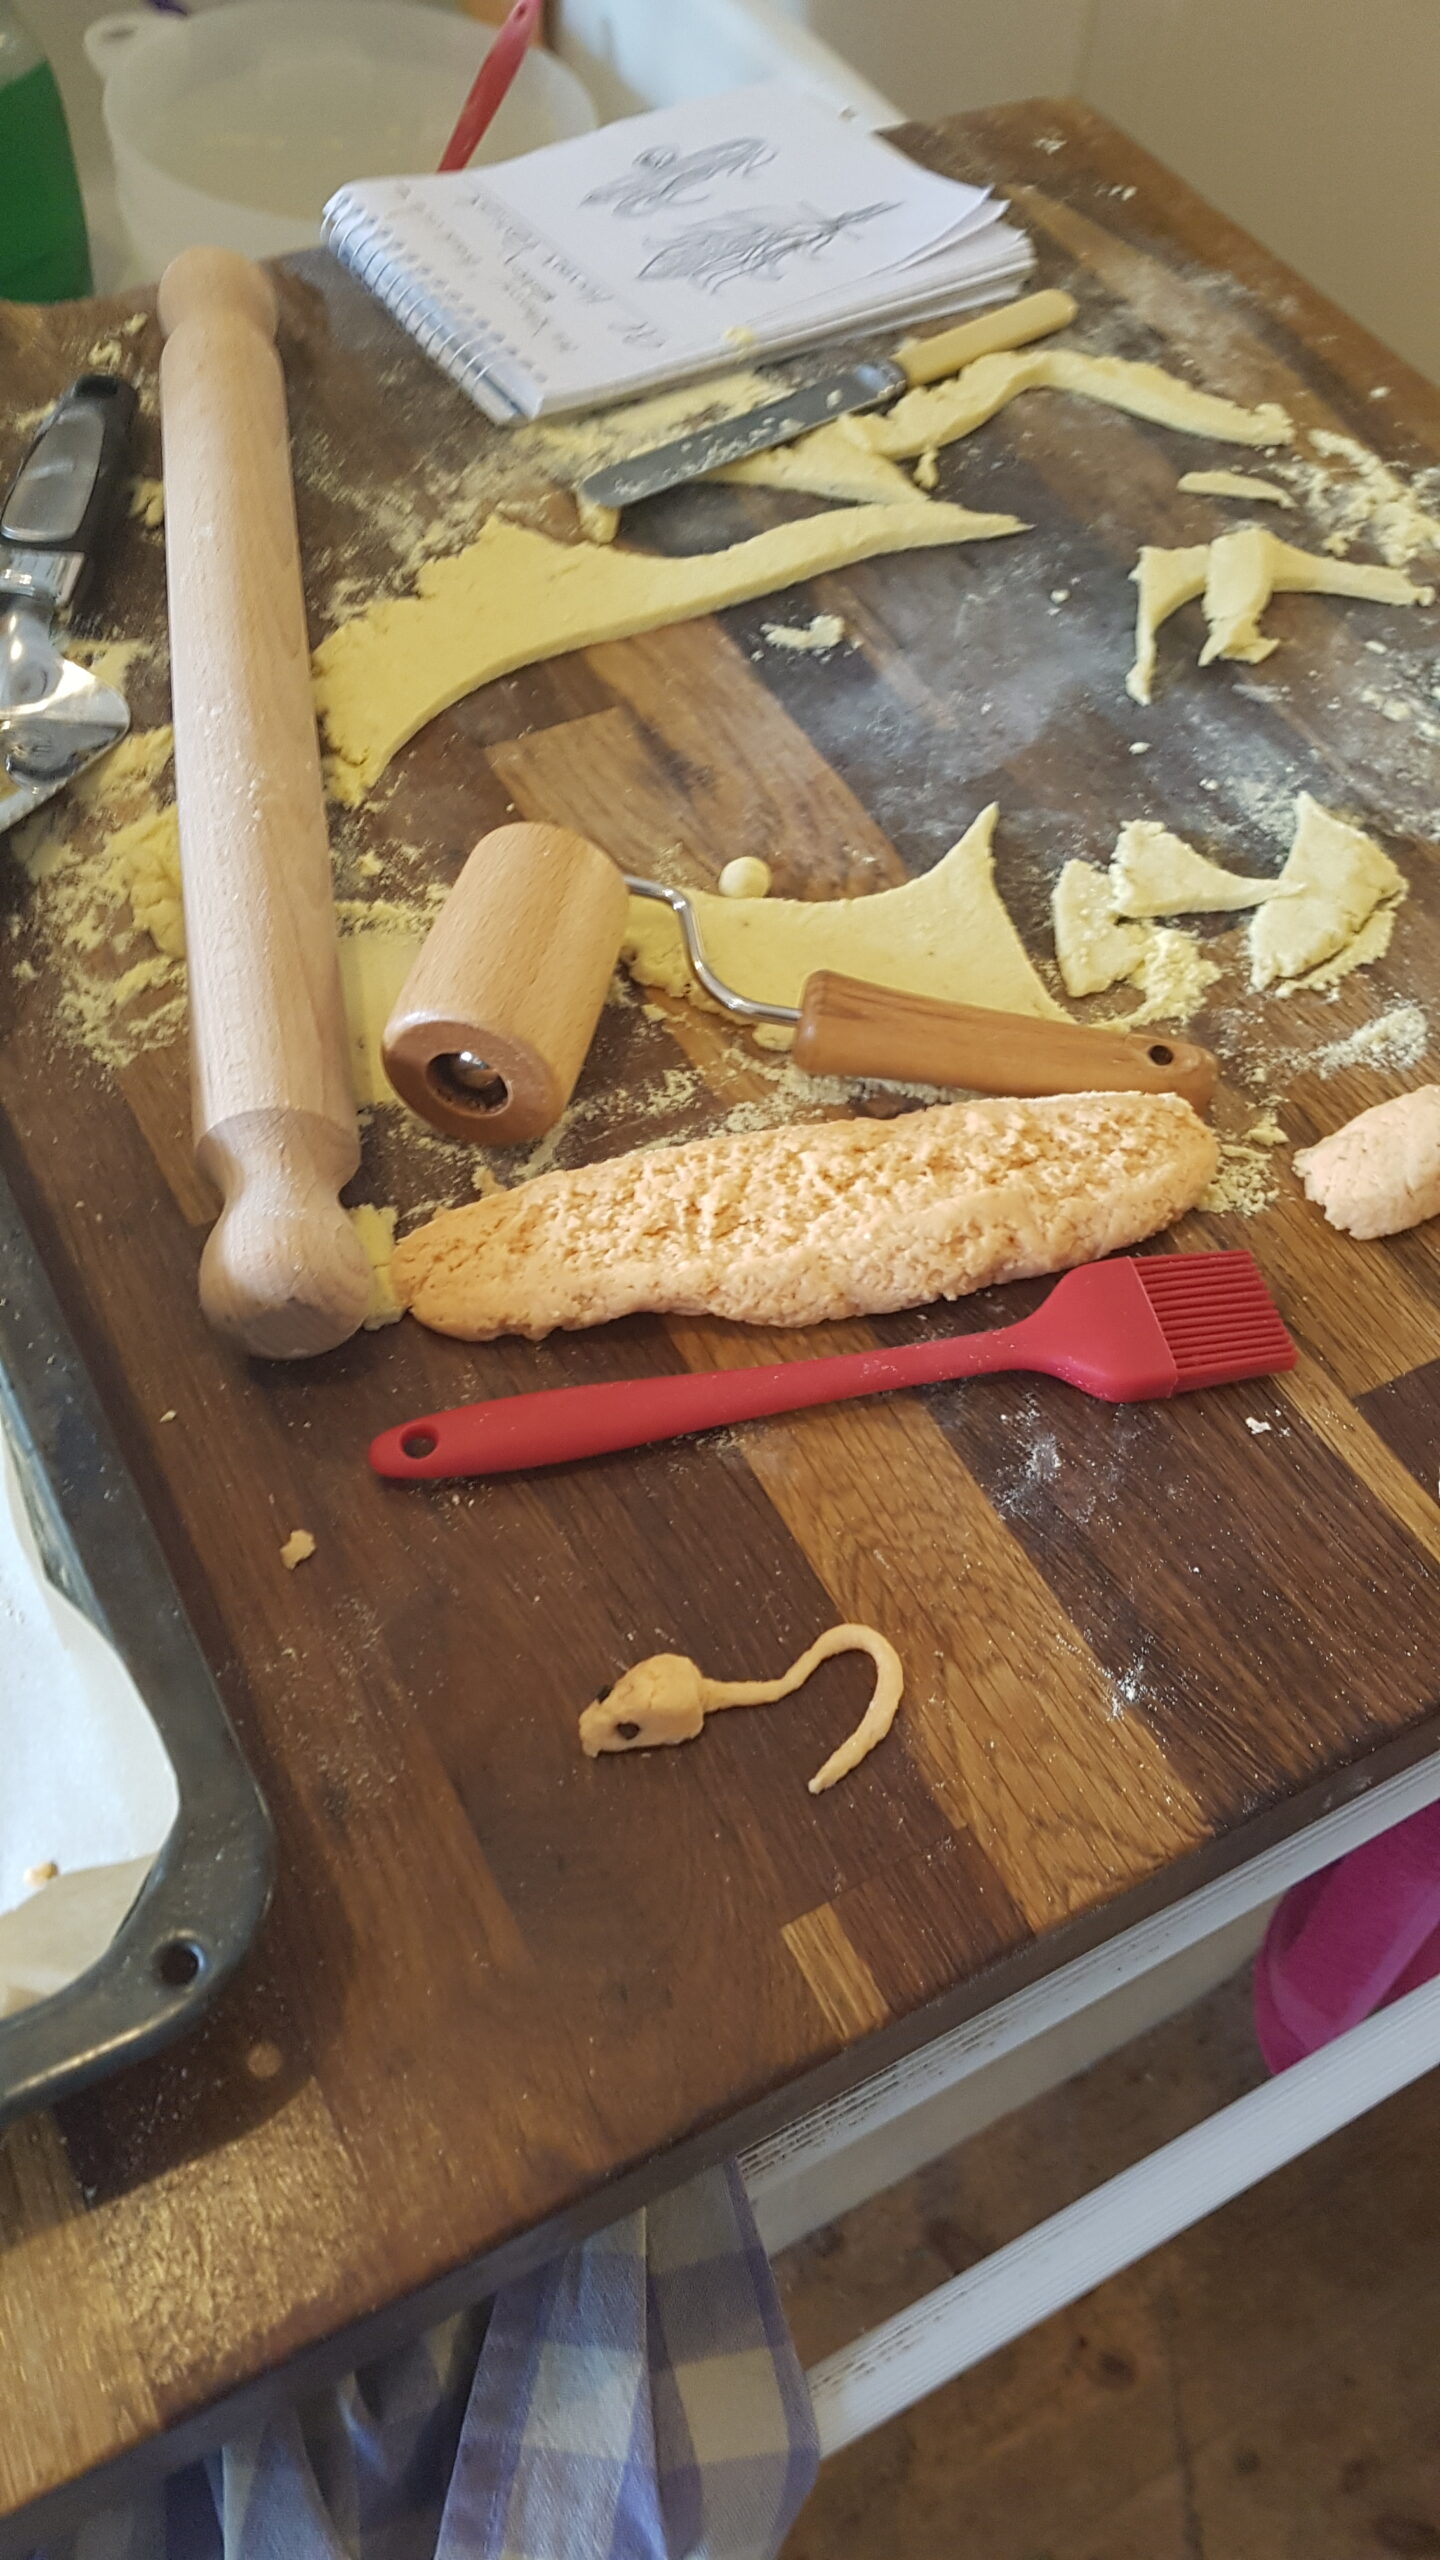
Leftovers can be used to make a decorative plait for the stalk, as in traditional wheat sheaf bread, and to make the all-important mice.
Take the yellow dough and roll it out to about 5mm thick.
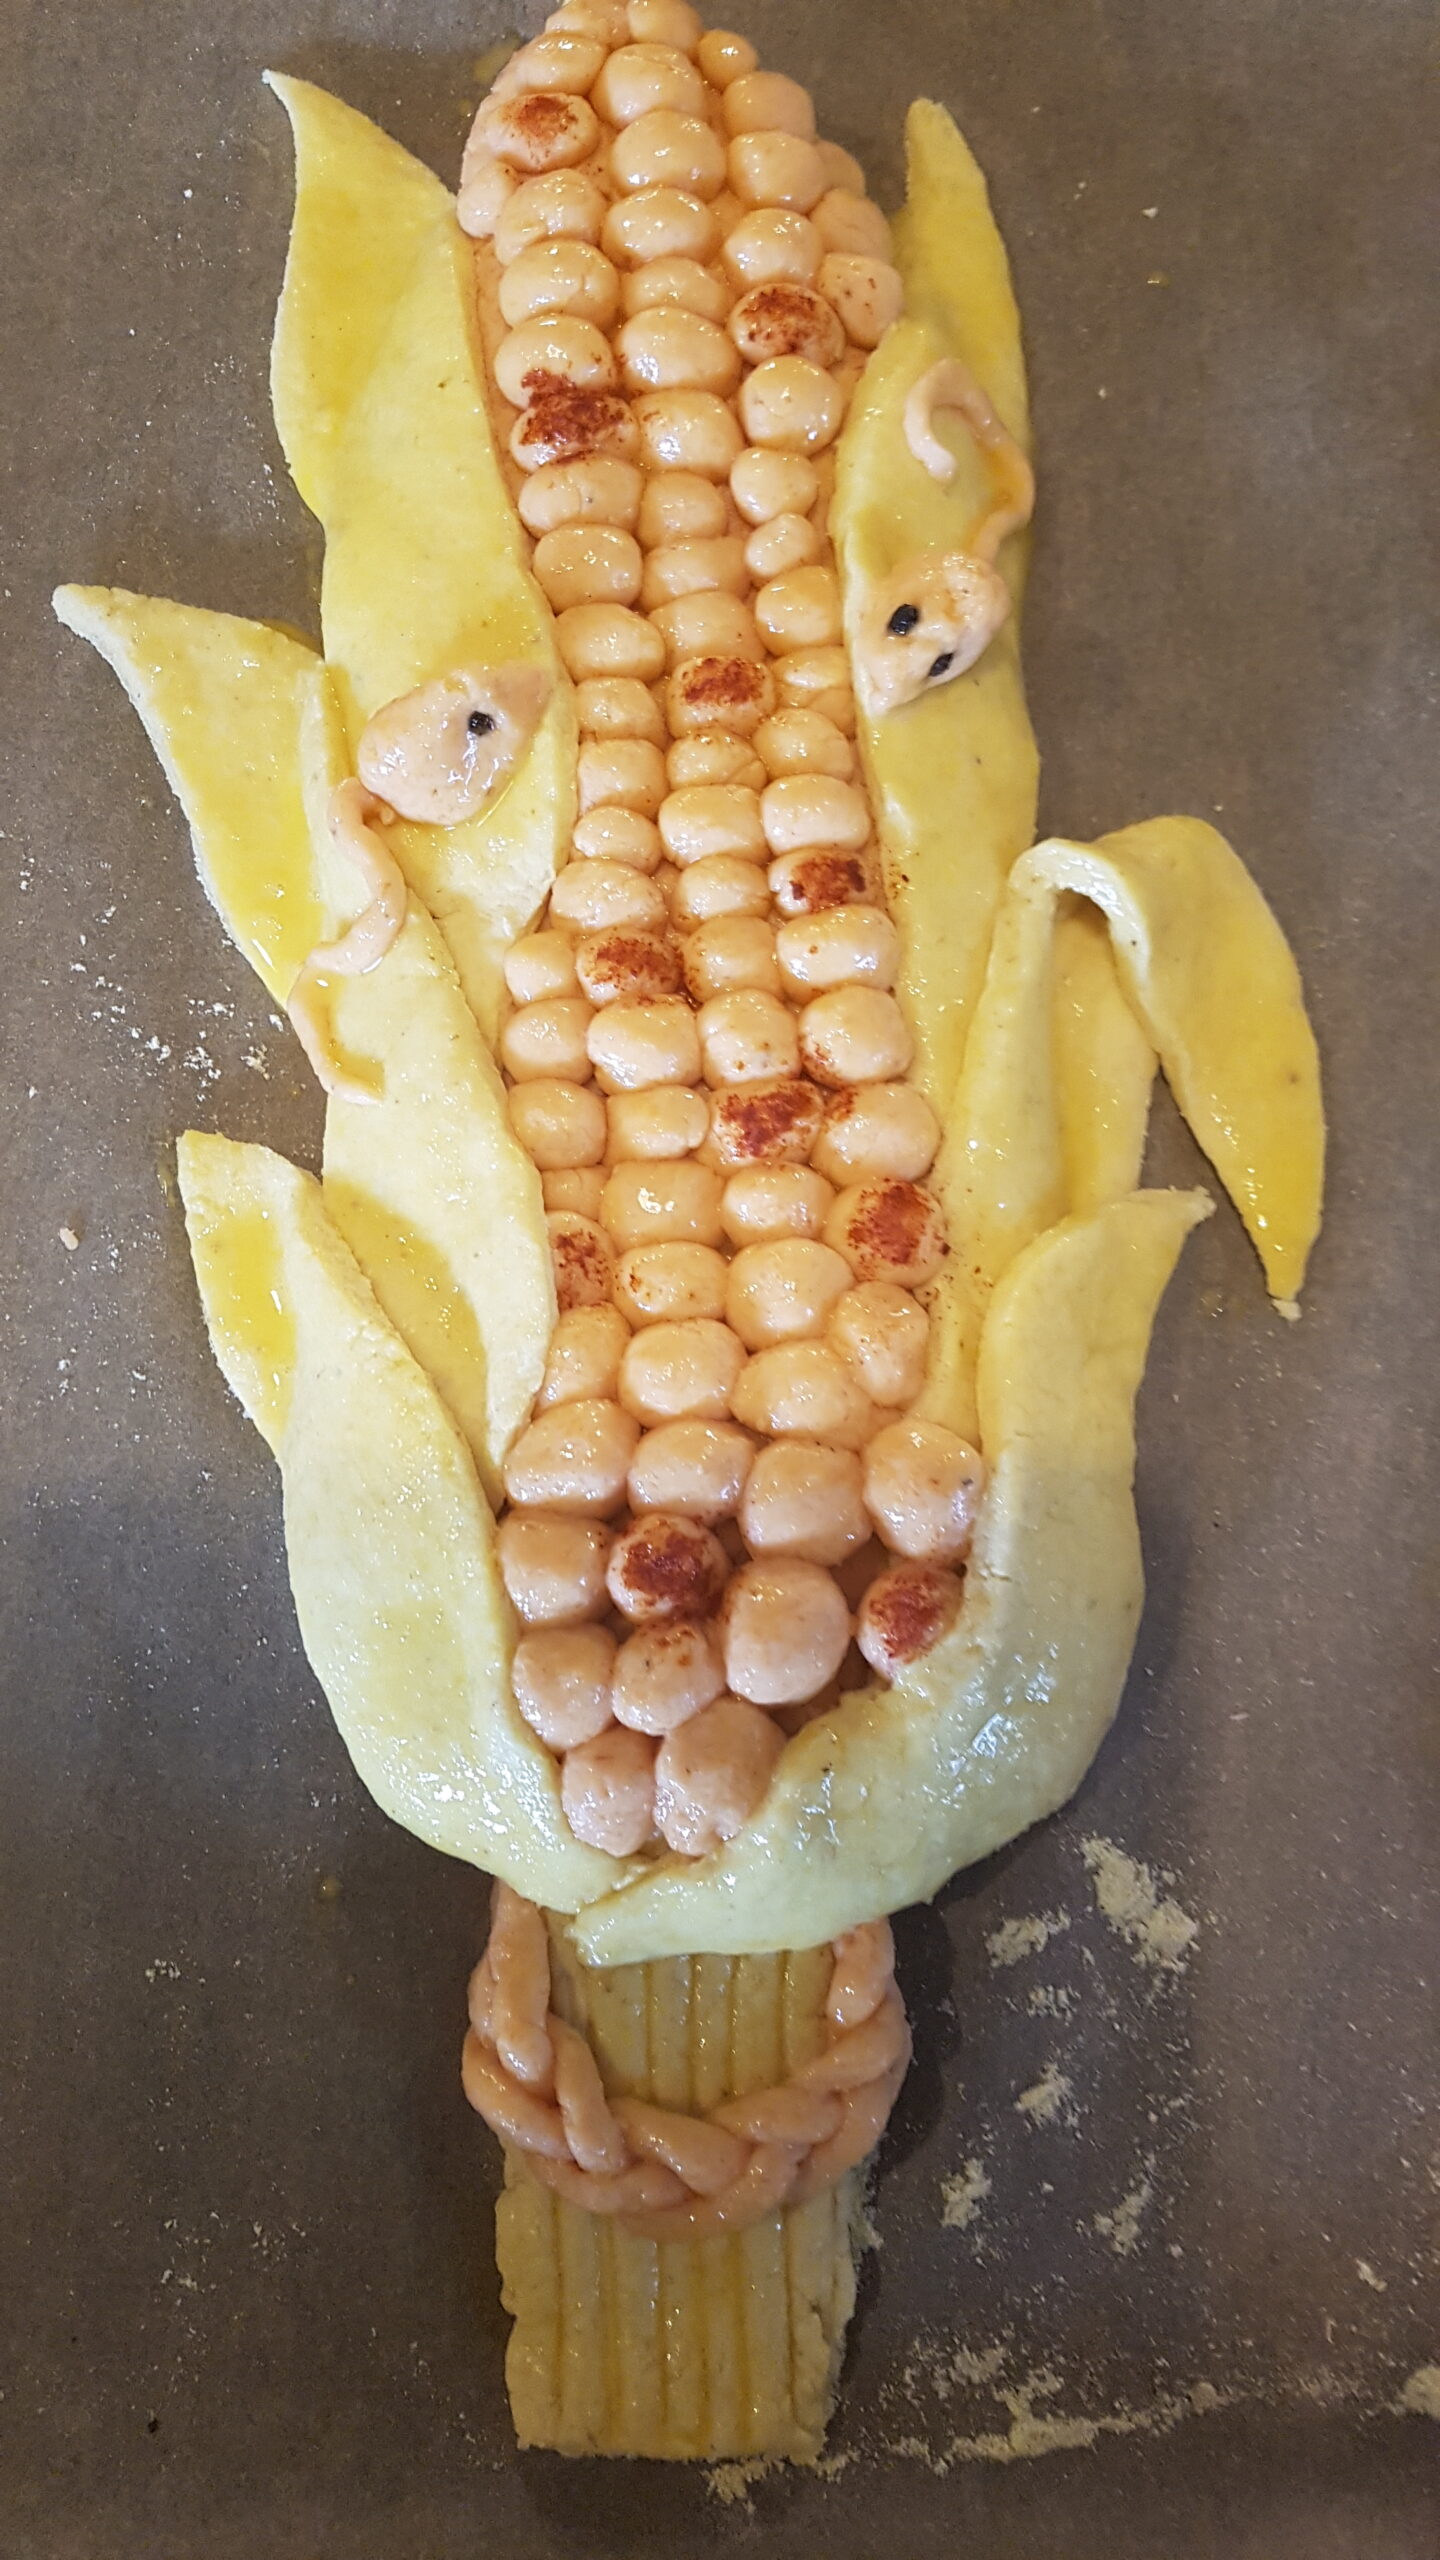
Cut out 6 long, wavy leaves to form the husk. I used three on the left, one tiny one behind the tip of the cob, and three on the right, one of which was long enough to fold over.
Arrange the yellow leaves on the red base.
Now add the niblets in straight rows, making sure to tuck some under your leaves for a more 3-D effect.
Shape the mice, using peppercorns for their eyes and position them on the husk, or wherever looks cute to you. I make tiny wedges of dough, and add finely rolled strings for the tails. Once you push the peppercorns in, they look surprisingly micey!
Glaze everything very carefully with beaten egg. If you want to create a more colourful impression in the niblets, you can brush some of them with smoked paprika, or even make some of them using the yellow dough too.
Bake in a pre-heated oven at 175 C/ 347 F for 21 minutes, turning half way through, and turning down to 150 C / 302 F if it’s browning too fast.
Allow to cool in the tray. It won’t be as rigid as a wheat loaf, so be careful how you handle it.
If you prefer not to use egg wash, I suggest baking it naked and then brushing it with olive oil before serving. If you use anything sweet (honey/agave) it will burn and your loaf will be too dark.